
Do you want to add a contact form, registration form, or newsletter form that website visitors can fill out? Forms are one of the things that you need to add to your website because forms can facilitate your interaction with your audience, besides that, you can also get audience data, so you can contact them in the future.
There are various form creation plugins, one of which is Gravity Forms. Gravity is a fairly complete and easy-to-use plugin for those of you who want to add forms.
For you multilingual website owners, when adding forms it is important to translate these forms as a form of your consistency with website translation. Then how to automatically translate and edit the Gravity Forms plugin? Check out this article until the end!
What is Gravity Forms plugin?
Gravity Forms is a paid WordPress plugin that allows you to create forms for your website. With this plugin, you can easily add contact forms, quizzes and surveys to your website with just a drag & drop.
Gravity is becoming popular because of the many templates it offers and the many custom fields that can be used. In addition, Gravity can also show or hide certain questions based on the user’s answers to previous questions, as well as redirect form submissions to the email address specified in the form content.
For over a decade, Gravity Forms has been the trusted WordPress form plugin. In this post, we’ll learn how to install Gravity Forms on your website, what templates are provided, how to create forms with Gravity Forms, and much more.
How to install the Gravity Forms plugin?
Before going into how to create forms, this time we will first install the Gravity Forms plugin. Because Gravity Forms is a paid plugin, you need to create a Gravity account first and get the license key.
Some of the Gravity Forms installation tutorial images below are taken directly from the official Gravity website.
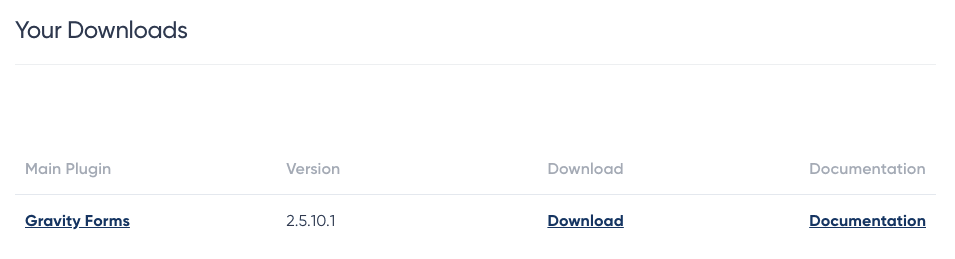
The first way is to access the Gravity website, register, then buy a Gravity plugin license. After that, you select Download to download the .zip file.
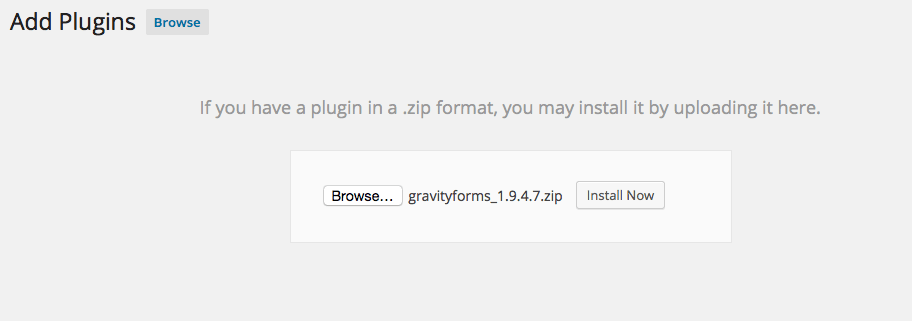
If the file has been downloaded successfully, then open the WordPress dashboard > Plugins > Add New > Upload Plugin then upload the zip file that was downloaded earlier.
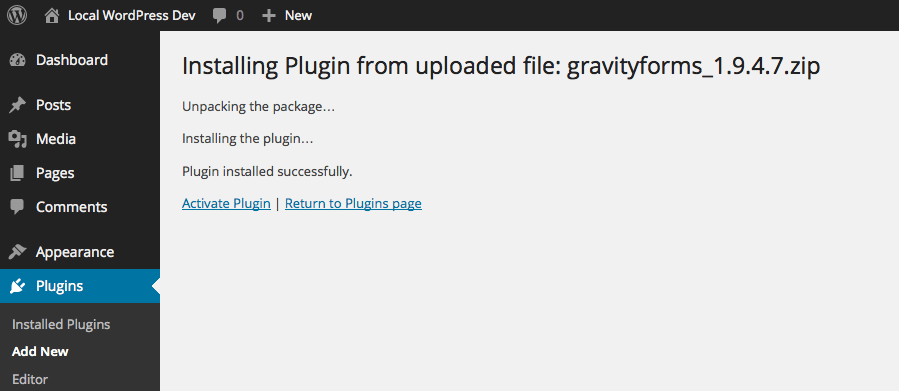
The next step is to activate the plugin, click Install Now > Activate Plugin.
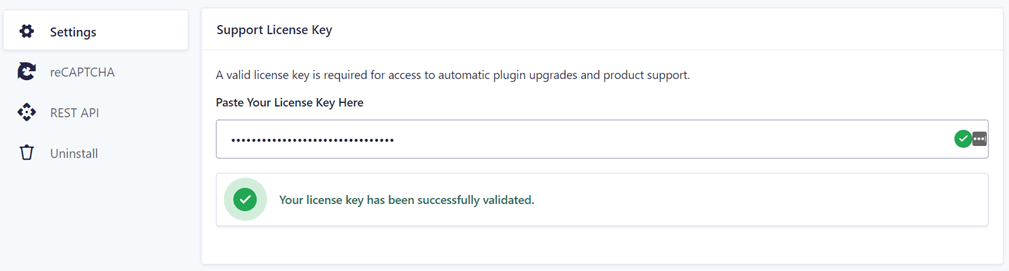
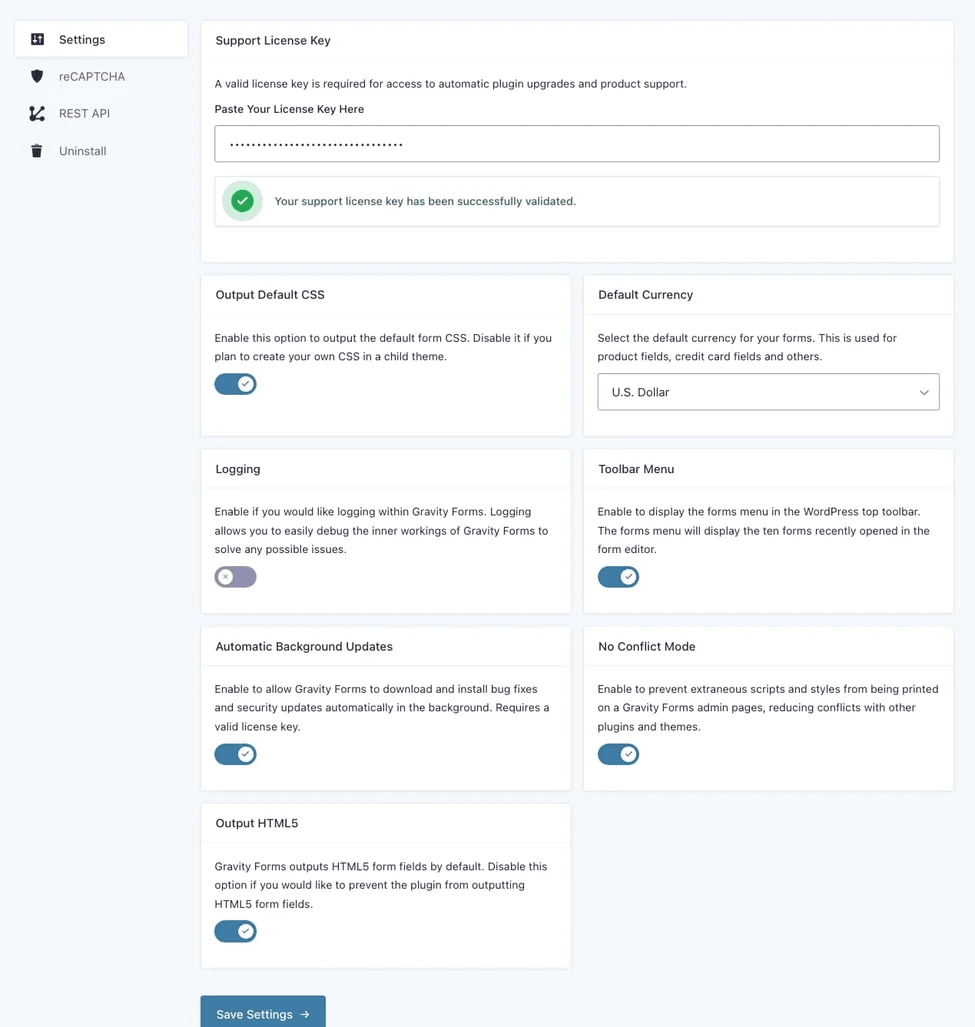
The last step is to enter the license key you got when purchasing. To do this, select the Forms menu > Settings > Paste Your License Key.
After that Save Settings or you can also set some other general settings as shown in the following image.
Template Gravity Forms

Now that the Gravity Forms plugin has been successfully installed, then we’ll see what Gravity provides, one of which is a template that you can customize immediately.
Gravity Forms provides several free templates that you can use right away or customize, it’s just that some of the following templates are included in the pro version.
- Simple contact form
- Advanced contact form
- Donation form (upgrade)
- eCommerce form (upgrade)
- Stripe checkout form (upgrade)
- PayPal checkout form (upgrade)
- Employment application form
- Event registration form (upgrade)
- Gift certificate form (upgrade)
- Newsletter signup form
- Request a quote form
- Survey form (upgrade)
- User registration form (upgrade)
- Webinar registration form
You can immediately use and edit some of the templates above as needed. If you want to make your own from scratch, you can choose Blank form.
Fields on Gravity Forms
After knowing what templates are provided, then we will discuss the available fields in Gravity forms. Fields are the parts that you will add to forms, fields in Gravity are divided into 4, including:
Standard fields
There are several standard fields that you can use in both the basic and pro versions of Gravity, including:
- Single line text
- Paragraph text
- Dropdown
- Number
- Checkboxes
- Radio buttons
- Hidden
- HTML
- Section
- Pages
Advanced fields
- Name
- Date
- Time
- Phone
- Address
- Website
- File upload
- CAPTCHA
- List
- Multi-select
- Consent
Post fields
- Title
- Body
- Excerpt
- Tags
- Category
- Post image
- Custom fields
Product fields
- Product
- Quantity
- Option
- Shopping
- Total
Those are the various fields in the Gravity Forms plugin, in the following discussion we will try to create forms using Gravity in WordPress.
Create forms with Gravity Forms plugin on WordPress
Now that you know what templates and fields are available in Gravity forms, then we’ll try to create these forms.
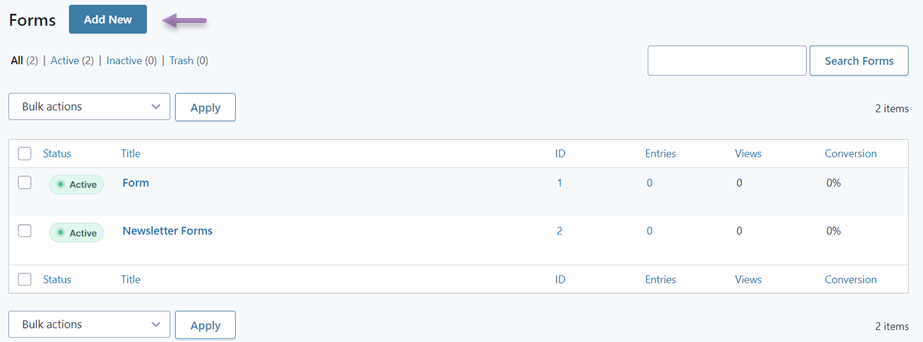
To do this, enter the Forms menu on the left menu and then select New Form. Then a display like the following appears, here are several forms that have been created before, you can click Add New if you haven’t created one at all.
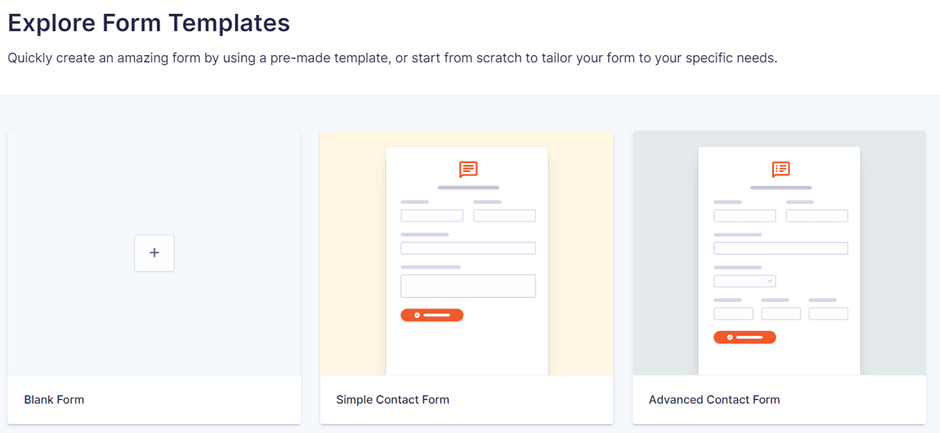
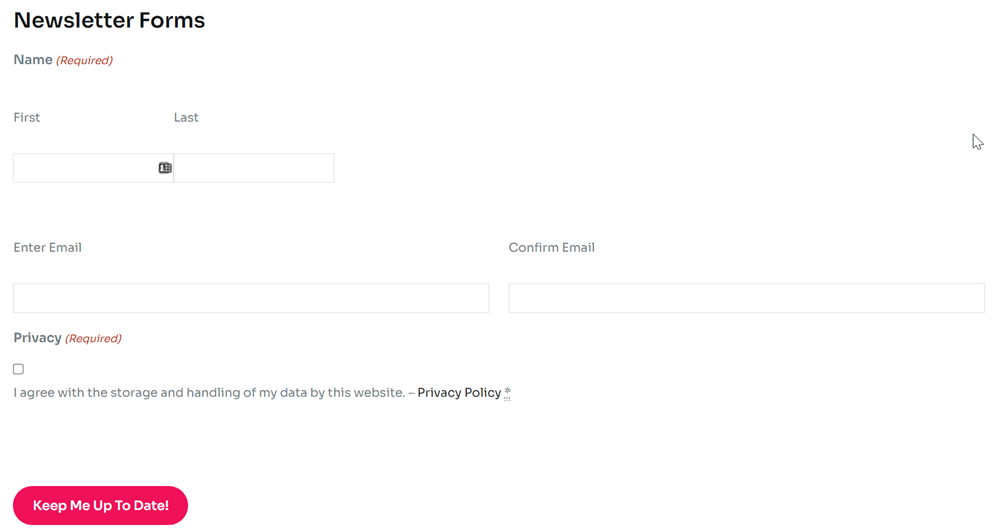
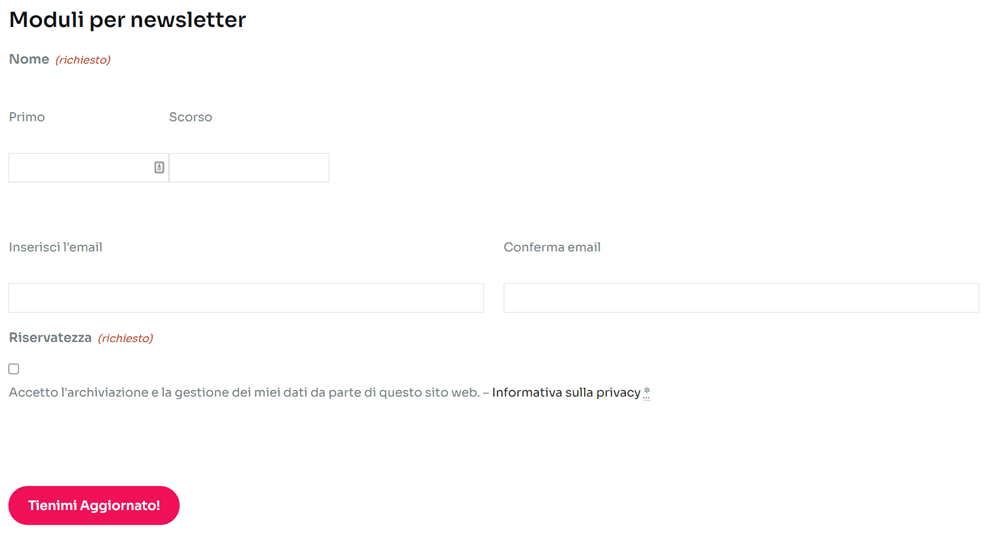
After that, you will be asked to choose the template you want to use or an alternative form. Here we will try to create a newsletter form, so choose the Newsletter Signup template.
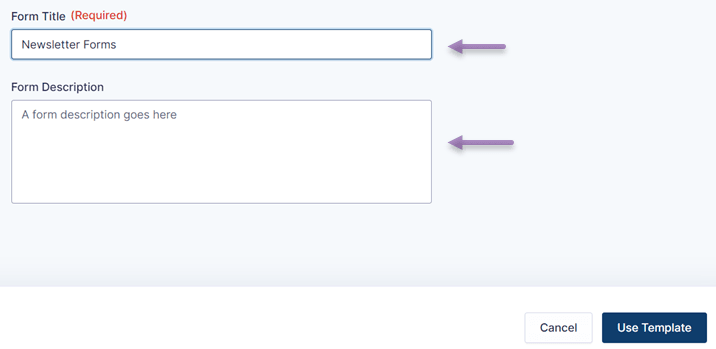
If so, then you must enter the name of the form to be created. You can also add a description after that click Use Template.
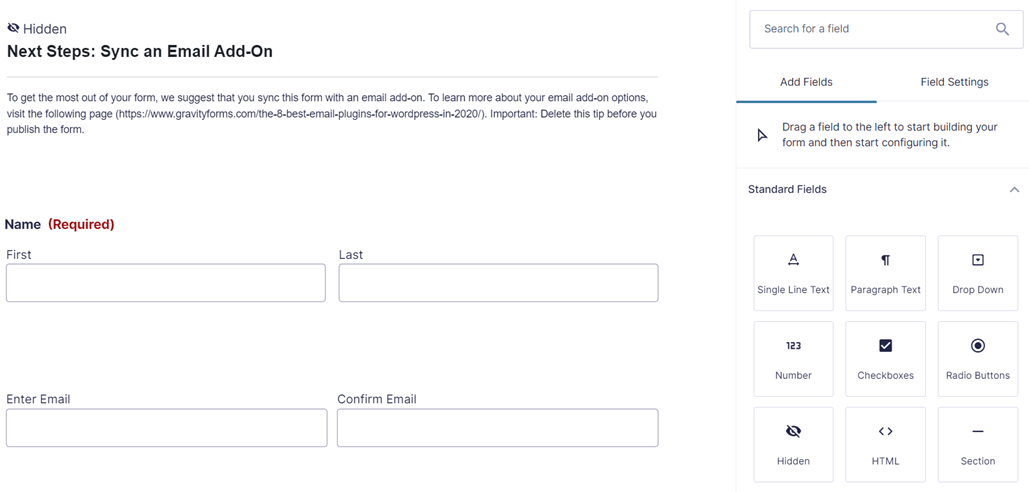
The next step is to edit the template that you have chosen. On the left, there is a newsletter template display and on the right, there are various field options that you can add.
You can also change the name of the label by selecting the Name, Privacy, or other labels according to the template. If you have adjusted the template, don’t forget to click Save Form.
So far you have successfully created a new form in WordPress using the Gravity forms plugin.
Embedding Gravity forms on your website
After the form has been successfully created, the next step is to insert the form into the website page you want. Insert a form into the website, there are various ways you can do it, namely through the element, the WordPress editor, or something else.
So, in this method, we use the default WordPress editor to include a form on one of the pages.
The first step is to open the page or content you want to insert the form for, for example here is the WooCommerce shop page then click Edit. After that, the WordPress editor appears as follows, then click the + icon as shown below. In the search field, write Gravity and select Gravity Forms.
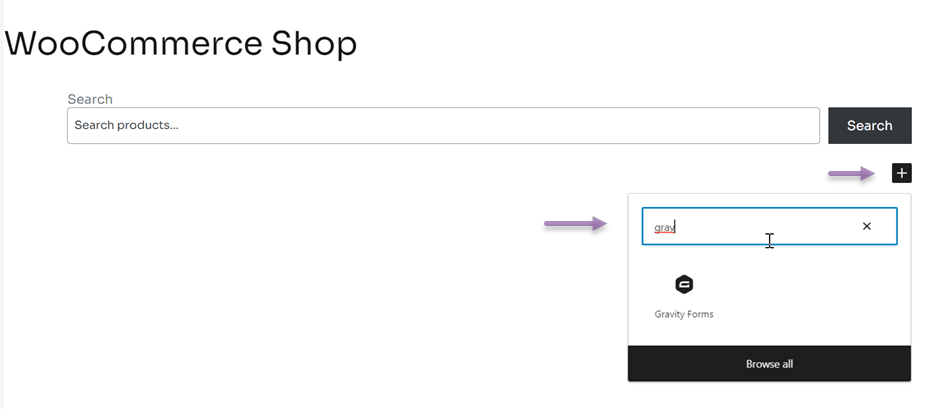
If so you will be asked to choose what form to insert from Gravity Forms.
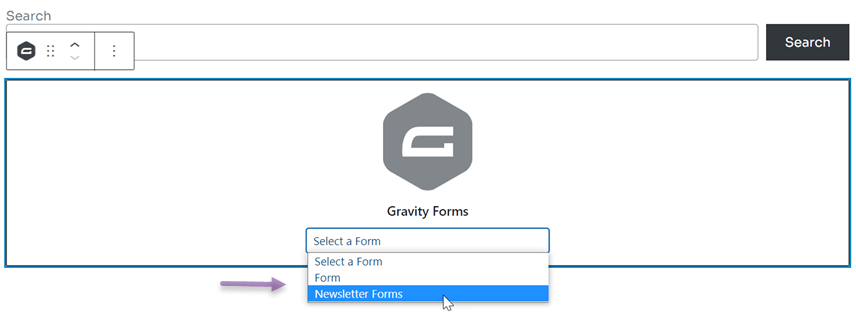
After the changes are saved, open the page that you inserted earlier, and the form will immediately appear on that page.
Automatically translate and edit Gravity Forms with Linguise
As a multilingual website owner, you should translate all the elements on the website, one of which is the form. That’s why it’s important to know how to automatically translate and edit the Gravity Forms plugin.
To translate websites into various languages, there are various WordPress multilingual plugins that can be used, one of which is Linguise.
Linguise is a website translation service that can translate various website elements such as forms. This service provides more than 80 languages, integrates with various CMSs, and can be used to translate all WordPress plugins.
In this article, we will try to translate the Gravity Forms plugin using Linguise. Here are the steps.
1. Register Linguise & get the API key
The first step is to register for a free Linguise account. Linguise provides a trial version that you can use for free for 1 month. During that 1 month period, you can translate up to 600 thousand words without any language restrictions.
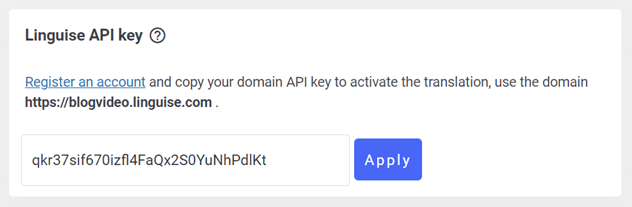
After that you will get access to the Linguise dashboard then select Settings. Scroll down then look at the API Key column then click copy to clipboard.

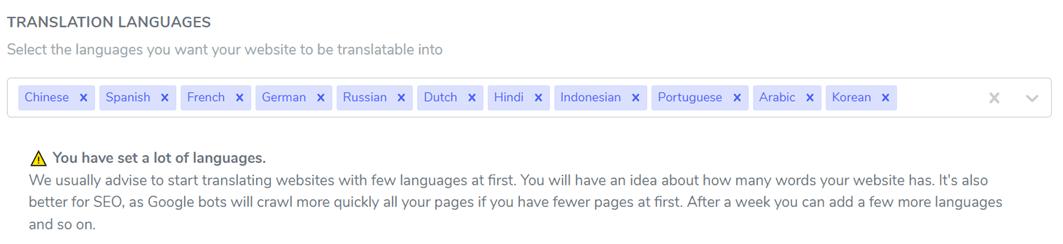
The next step is to choose the language that you will add to the website. You can add several languages at once, how search for the language then click on the language. If you have clicked Save Changes.
2. Install Linguise and configure the plugin
Then install the Linguise plugin on your WordPress dashboard then select Install and Activate. If the plugin is already installed, then you have to paste the API that you copied earlier.
In the Linguise API key column, paste API and click Apply.
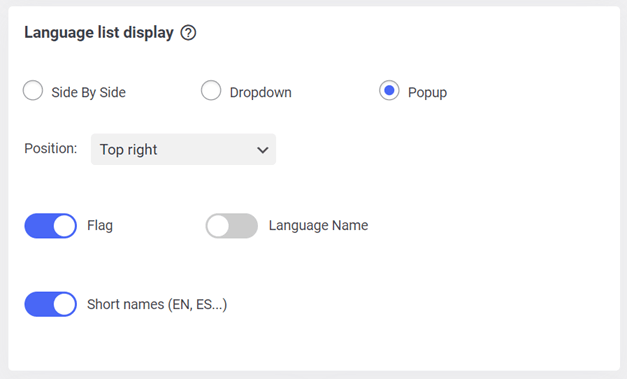
After that, you also have to set the language list display on the website, on multilingual sites you have to set the language list to make it easier for visitors to switch from one language to another.
How to select side-by-side, dropdown, or popup. Then select the position and choose whether the displayed language and language name, or the language with the abbreviated language name. If so, don’t forget to click Save Settings.
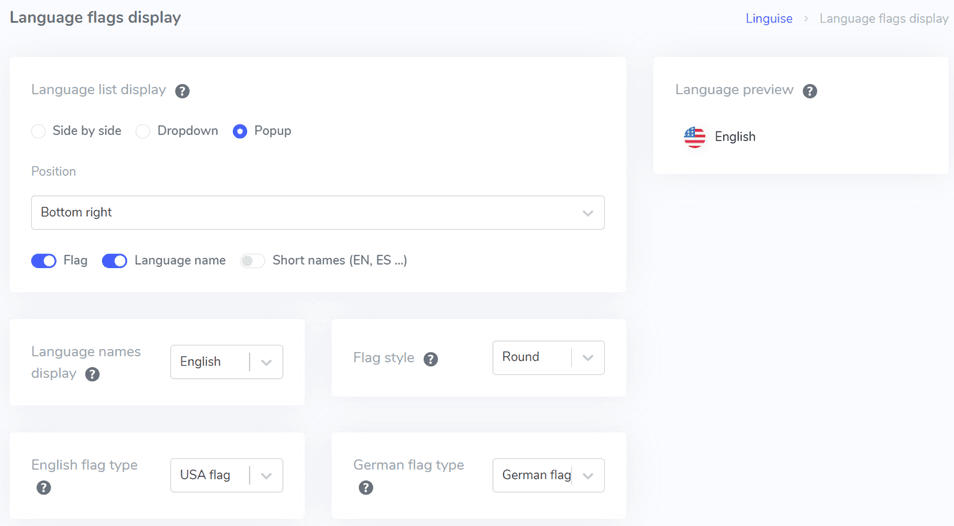
Apart from going through the WordPress dashboard, now you can also set it via the Linguise dashboard, this is our new feature that was recently launched, how to select Settings > Language flags display.
If the changes have been saved, it’s time to see the translation results of the Gravity Forms plugin. Here we will try to translate from English – Italian.
3. Edit translation Gravity forms plugin with Linguise live-editor
Apart from direct translation, Linguise is also able to edit translations live through the front page or front end. This allows you to edit the translation in certain parts only.
To do this, you need to access the Linguise dashboard then select Live Editor > Open Live Editor > choose Language> Translate.
After that a display appears as follows, here we will try to translate from English to Italian as well, if you have clicked Save.
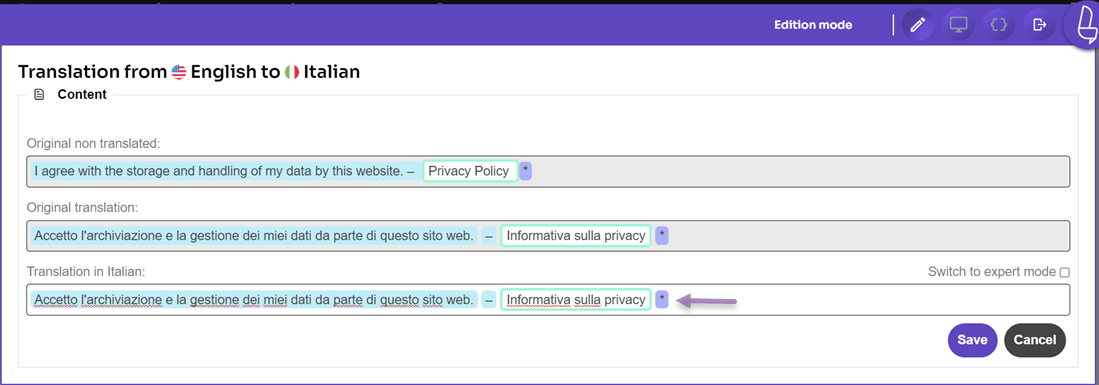
So far you have successfully translated the Gravity Forms plugin using the live editor feature in Linguise.
For those of you who are interested in using Linguise, list the free trial features for 1 month, after the trial period is over you can extend the package at the following prices
START
- INCLUDED IN 1st MONTH FREE TRIAL
- 200 000 translated words
- Unlimited translated page views
- Unlimited languages
- 10% OFF compared to monthly prices
- 1 website per plan with one month free
PRO
- INCLUDED IN 1st MONTH FREE TRIAL
- 600 000 translated words
- Unlimited translated page views
- Unlimited languages
- 10% OFF compared to monthly prices
- 1 website per plan with one month free
LARGE
- REGISTER & SUBSCRIBE
- UNLIMITED translated words
- Unlimited translated page views
- Unlimited languages
- 10% OFF compared to monthly prices
- 1 website per plan with one month free
Conclusion
Now you know how to automatically translate and edit the Gravity forms plugin, complete with Gravity installation, and create new forms, and various templates available in the Gravity plugin.
In choosing a translation service, make sure the service is integrated with various plugins such as Gravity Forms, so that your WordPress forms can be translated into various languages.
That way, visitors from outside your country can still fill in and understand it.