Custom fields are a feature that allows users to add custom information or additional meta-data to each post or page they create.
When you have a multilingual website, the custom fields on WordPress must also be translated. By translating all custom fields, users from other countries can still understand your WordPress content.
Then how to translate all the WordPress custom fields? Here we will explain it in full.
What is custom fields on WordPress?
On the WordPress platform, custom fields are a feature that allows users to add custom information or additional meta-data to every post or page they create. Custom fields are used to store and display information that is not included in the core or standard sections of a post or page.
On WordPress, every post or page has a basic structure consisting of title, content, date and a few other attributes. However, by using custom fields, users can add additional relevant fields to expand the information associated with that entity.
Using custom fields on WordPress allows users to be more flexible in managing and displaying relevant and specific information according to their needs. Custom fields are usually used in conjunction with programming functions such as Template Tags or custom Plugins to display that information in a WordPress theme or in a web page view.
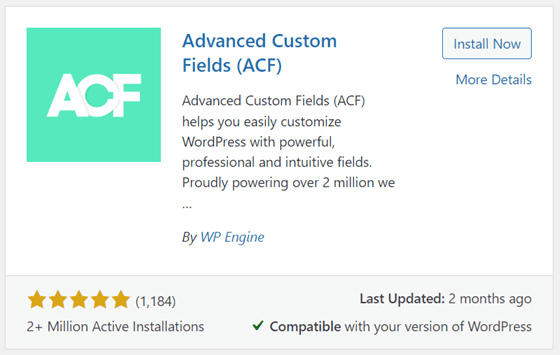
One of the plugins that you can add to create custom fields is Advance Custom Field, in this article we will try to install this plugin on WordPress.
Install & activate plugin Advance Custom Field
You can easily find the Advance Custom Field plugin on WordPress, by clicking Plugins then selecting Add New, then looking for the Advance Custom Field plugin in the top search field.
If you have selected Install Now and wait a few moments, when finished select Activate to activate it.
If the plugin has been installed, now a new menu appears, namely ACF in the navigation menu on the left, click on the menu then a page will appear as below.
On the following page, there is already a field group that was created earlier.
Create custom fields WordPress for post
After successfully installing the Advance Custom Field plugin, we will try to create custom fields in WordPress. Before entering into custom fields, you need to know that there are several types of fields in this plugin that you can choose from, including:
- Text
- Text area
- Number
- Range
- URL
- Password
- Image
- File
To create a custom field, you can directly add a field on the page as above. After that, there are several fields that you must fill in, including the following.
- Field type: is the type of field that you will display in WordPress, for example here you want to display the date time.
- Label field: the name that will appear on the post edit page.
- Field name: this field name will usually appear automatically based on the field label that has been made.

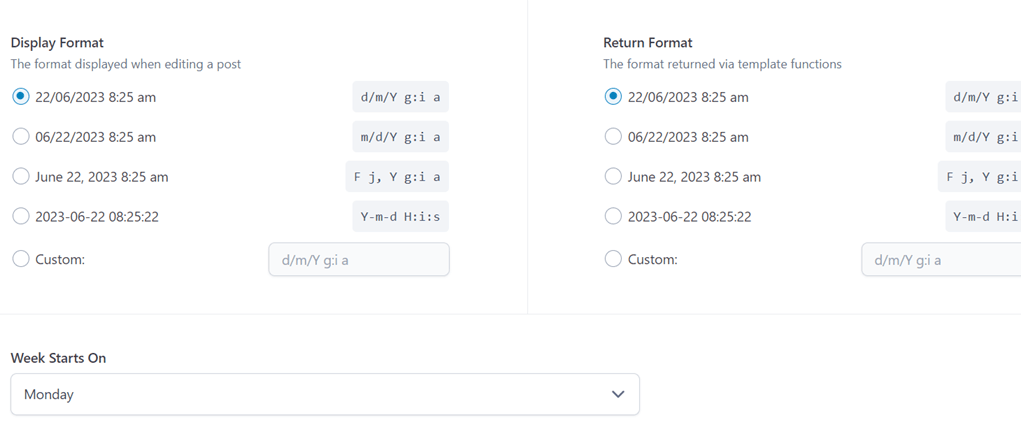
After that, because you choose the date time picker type, settings will appear to choose the display format which will later appear on the posting page.
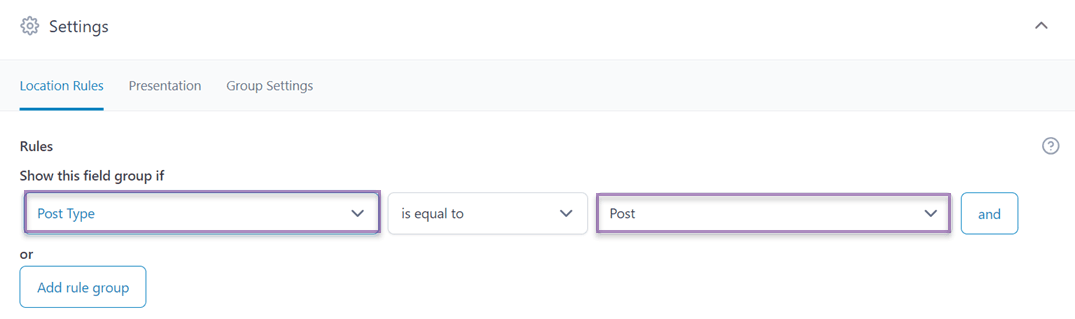
If all the fields are filled in, then scroll down you will find a setting where this field will appear.
In the Show this field group if column you can choose Post, Page, User, or Forms, in which there are more specific sections such as post type.
Then, in the next column select is equal to so that your group field appears. Then in the third column choose where this field will appear, for example, in all sections whose category is Post.
If so, now open one of the posts on your website, at the very bottom of the post a display will appear as follows.
You can click on the column to adjust the date.

Supposedly, after setting these custom fields can immediately appear on the front page of the post. However, in some cases you will have to add a shortcode like the following below your post editor.
[acf field="FIELD_NAME"]
As the following example.
If so, click Save then try to open your post now. Then the result will be like this.
You have successfully created a custom field for posts on WordPress. If you want to create another custom field, for example on pages, do the same as above.
How to translate all the WordPress custom fields with Linguise
You need to remember, if your website is multilingual, it is important to translate all WordPress custom fields into the language provided.
There are several benefits if you translate custom fields into various languages, such as.
- Multilingual user experience: by translating custom fields, you can improve the user experience for multilingual audiences.
- Consistency: translating custom fields ensures stability across your website or app.
- SEO and organic traffic: search engines can index and rank your content in multiple languages, thereby increasing website traffic.
In translating custom fields, don’t be careless, make sure you choose a quality website translation service, provide many languages, and, of course, have a live-editor feature.
Because the live-editor feature will make it very easy for you to find results and avoid inappropriate automatic translation.
Immediately, we will try to translate using Linguise.
#1 Register Linguise and get the API key
The initial stage involves creating a Linguise account by signing up or registering. This account creation does not require entering credit card details. Upon successful registration, you will be granted entry to the Linguise dashboard.
The dashboard functions as the main control center for handling all translation configurations for your website. It encompasses tasks such as domain registration, word usage tracking, and language selection.
To acquire the API key, navigate to the Settings menu, locate the section labeled “API KEY,” and proceed to copy the designated API key provided in that section.

#2 Add language to your list
After acquiring the API key, continue scrolling down within the Settings menu, and you will encounter the Languages section. This section allows you to incorporate additional languages into your website.
#3 Install Linguise & configure
The next step involves installing and activating the Linguise plugin on your website. To accomplish this, access your website’s dashboard and proceed to the Plugin menu. Click on “Add plugin” > “Linguise” > “Install” > “Activate”.
Once the plugin has been successfully installed, access the Linguise settings menu and paste the previously copied API key into the designated field. Lastly, click on “Apply” to save the modifications.

Then, you can also set the display language as shown below.
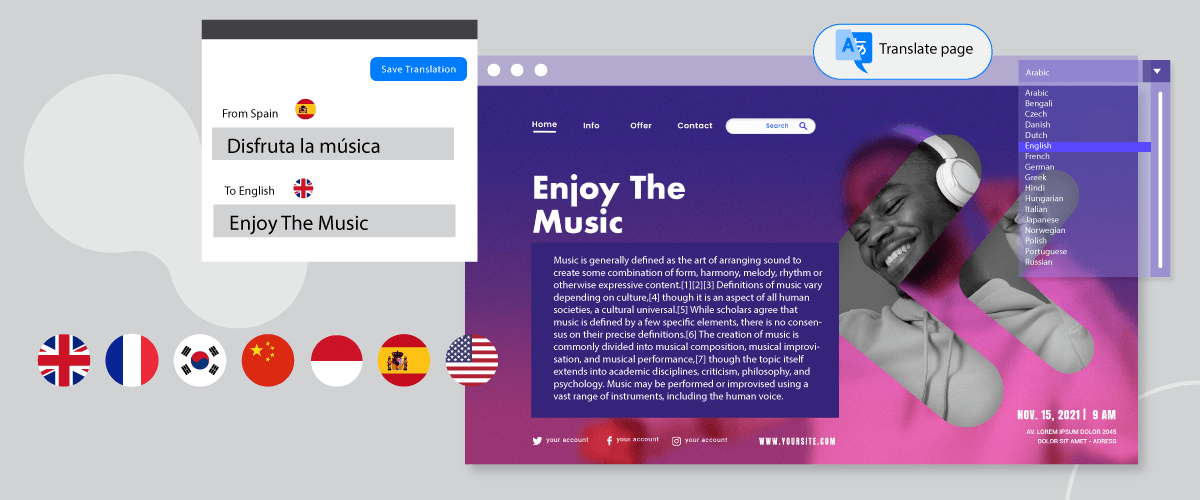
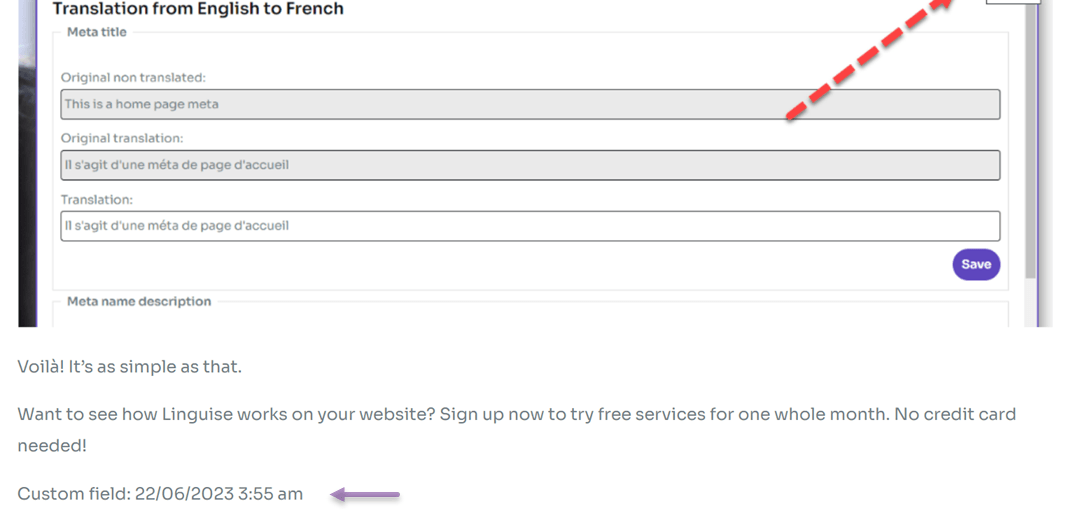
#4 Translate custom fields
If all the settings have been done, now try to open the post for which you have added a custom field then translate it into another language you want, select the language here.
After that, a display like the following appears, the custom field has been translated successfully.
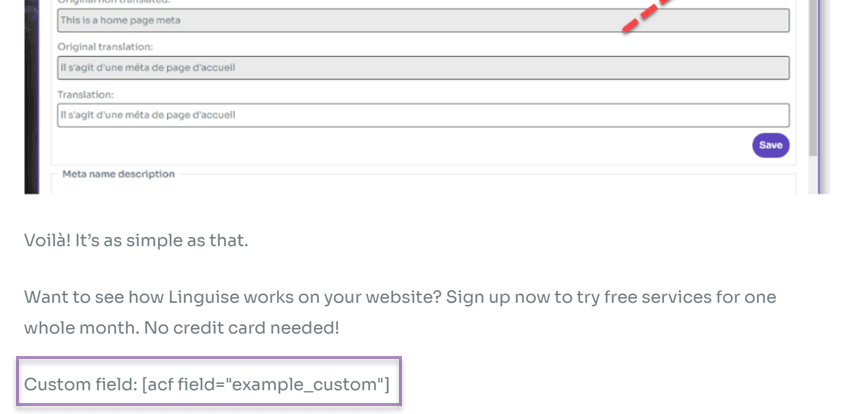
#5 Edit translation with live editor
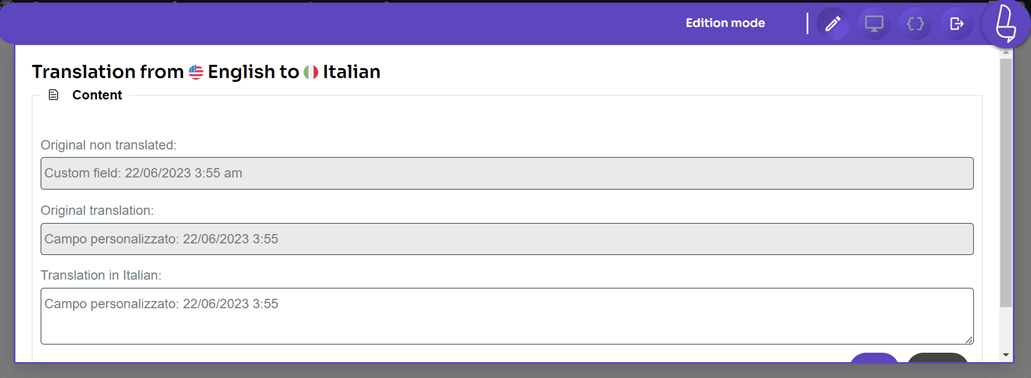
Besides translating custom fields automatically using Linguise, you can also translate manually with the live editor feature. This feature allows you to edit the translation results produced by Linguise automatically.
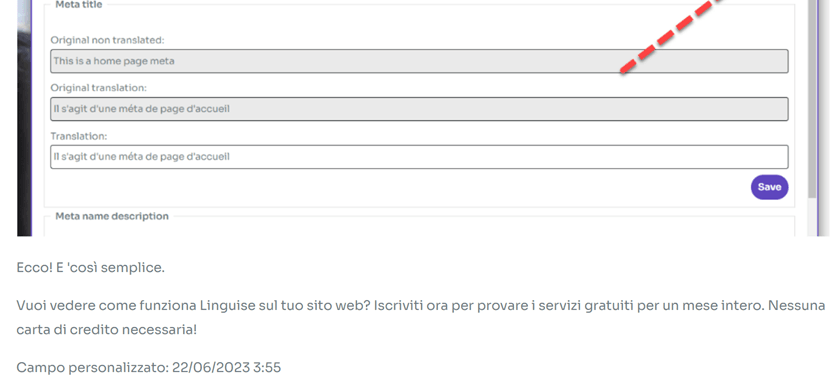
To do this, open the WordPress dashboard > Live Editor > Open Live Editor > select language > Translate.
Then select which part you want to translate, then click Save to save changes.
Conclusion
Up here you already know how to translate all WordPress custom fields with Linguise. Apart from that, you also understand better how to create custom fields on WordPress using the Advance Custom Fields plugin.
With Linguise, you can easily and quickly translate WordPress custom fields. So that users from various national backgrounds can still understand your content.
What are you waiting for? Register for a Linguise account right away and use the free trial version for 1 month!