Linguise continues to expand its reach to support more global users. Now, users can enjoy full support for the Brazilian language (Portuguese-BR) and its flag icon across all Linguise dashboards and CMS integrations. So, what does this language addition mean for you, and how can you enable it on your site? Let’s talk more!
What’s new: Brazilian language & flag support

Linguise has now officially added support for the Brazilian language (Portuguese-BR), complete with a system-wide display of the Brazilian flag. This update includes display on the Linguise dashboard and across various CMS integrations such as WordPress, Joomla, and other popular platforms.
With this support, you can add Brazilian as a translation option and automatically display the Brazilian flag icon in their site’s language selector. This will make it easier for visitors from Brazil to navigate the site in their native language.
How to add the Brazilian language and flag?

If you want to add the Brazilian language and customize the flag on your website, here are the steps you need to follow.
Step 1: Preparation before adding Brazilian
Before adding Brazilian to your website, make sure you have completed the following preliminary steps:
- Already have a Linguise account
- Your website domain is registered on the Linguise dashboard
- Make sure you are using the latest version of the Linguise plugin or module in your CMS (such as WordPress or Joomla)
If everything is ready, follow the steps below to add the Brazilian language and display the flag.
Step 2: Added Brazilian language via dashboard and CMS
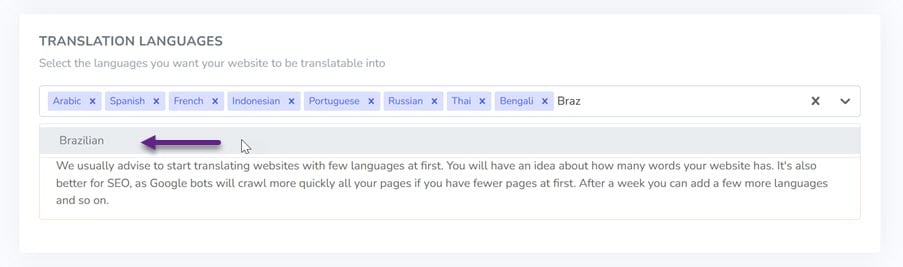
First, go to the Linguise dashboard, log in to your Linguise account, and select the domain you want to manage. Next, go to the Settings menu.

Then scroll down to find the Translation languages column. Search and select Brazilian from the list.
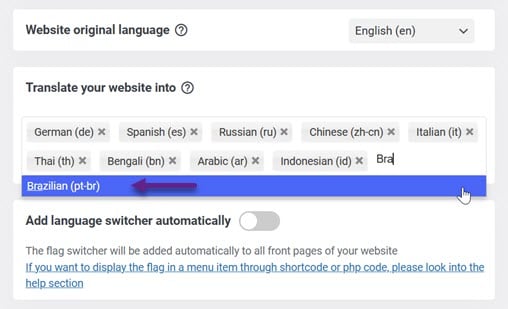
If so, click Save to save the changes. Next step, if you’re using a CMS like WordPress. Log in to your WordPress dashboard. Go to the Linguise plugin settings. Add the Brazilian language from the available options and click Save to apply the changes.
Step 3: Customizing the flag display and ensuring translation results
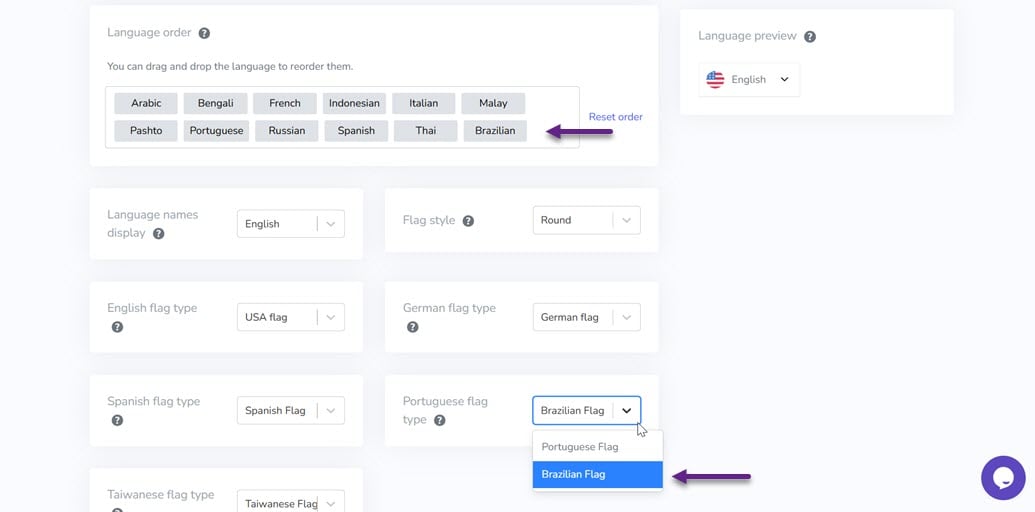
After adding the Brazilian language, you can also set the flag display on both the Linguise dashboard and the CMS. On the Linguise dashboard, you can select the Language flags display menu and then set the flag display and language order. In addition, you can also choose to display in Portuguese or the Brazilian flag.
Finally, we will check if the Brazilian translation works properly, for example, on the following English page.

Then we translate it by selecting Brazilian. It will look like this.

Notes: For Linguise, WordPress, and Joomla dashboards, all three use script-js dependencies, so ensure there are no conflicts or old versions in use. Also, currently both pt and pt-br will link to the Brazilian language (Portuguese-BR)
Conclusion
The presence of Brazilian language support and flags throughout the dashboard, as well as CMS integration, further helps users, especially those who reach users from Portuguese-speaking countries, especially Brazil. You can now easily and quickly translate your website into that language.
To maximize this feature, update your Linguise plugin or module to the latest version. With the latest version, you will get the best performance, complete language support, and the Brazilian flag display that is now available. Update the Linguise now and expand your site’s reach to a wider global audience!