

Table of Contents
Enabled debug
Even if we do our best to provide fully functional extensions, some incompatibilities may occur with specific server configuration.
Don’t worry, we’ll help you to sort it out. Though, we may need some debug information to help us.
To activate debug, please follow these simple steps.
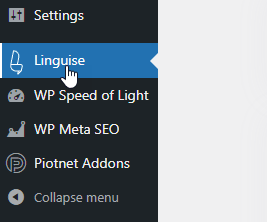
Log into your website backend and click the Linguise translation menu item
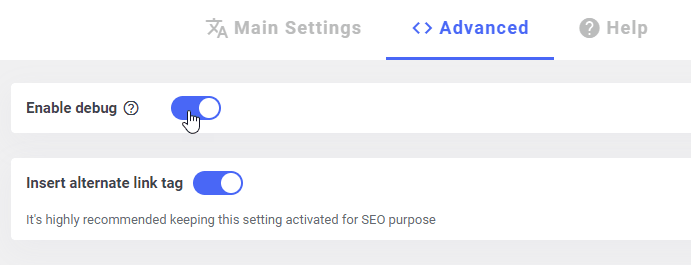
Click the Advanced tab the scroll to the end of the page and enable the debug. Press Save Settings.
Generate the debug file
We’ll now describe how to generate a debug file you’ll need to share with us later.
Open another tab and visit one of the multilingual page like:
https://www.yourwebsite.com/es?123456
Make sure to replace the language code by one of the language code you actually use, in this example this is /es for Spanish
The ?123456 at the end is only appended to avoid loading a page cached by your browser.
Return to your previous tab, the one with the Linguise settings, and reload the page (press F5 on your keyboard). You should now see a link after the enabled debug option.
Click this link and download the file locally on your computer.
This file contains debug information, you can open it and have a look to see that we don’t send sensitive data. Our script removes all the sensitive data we don’t have to know about to preserve your privacy.

Share your file with us! You can then email us at [email protected], attaching the download file to it and explaining your issue.
You can now disable the debug option.