Table of Contents
Volusion access requirements
The cloud AI automatic translation to be used with Volusion Website Builder requires some access to complete the setup:
- Volusion admin access
- Domain DNS modification on Volusion
The Volusion site setup is composed of 3 simple steps:
- Register your domain to authorize the translation
- Modify the domain DNS according to the translation languages
- Add the language flag switcher link to your Volusion Website Builder settings
How to make your Volusion Website Builder multilingual in video
Register your Volusion domain
After your connection or registration to the Linguise dashboard, you’ll be asked to register your domain to authorize the translation.
For that purpose, just copy your domain name with the https:// included and select “other” for the platform.
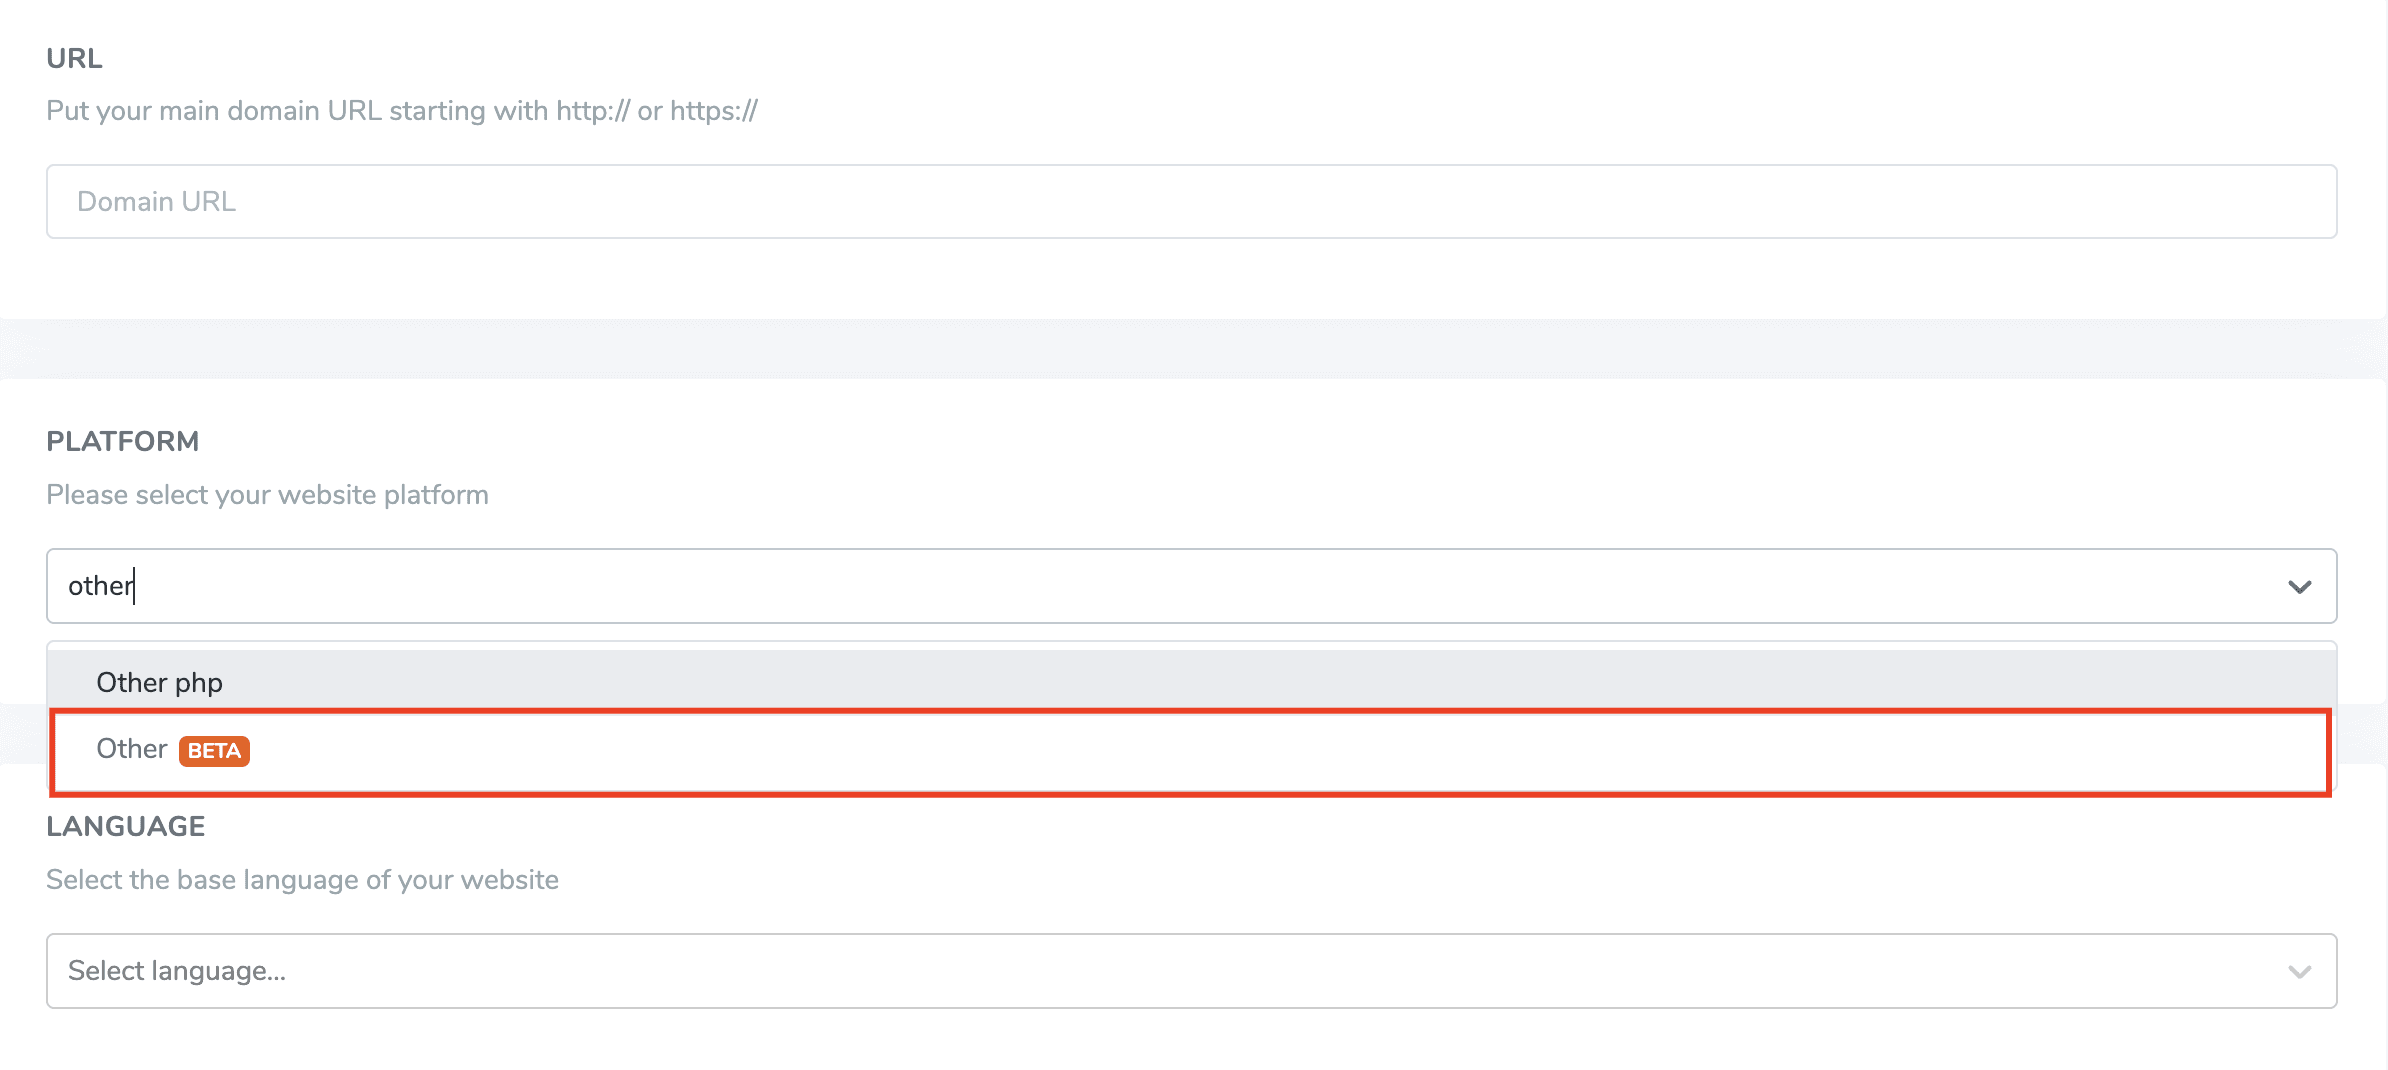
After that, select your source and destination language.
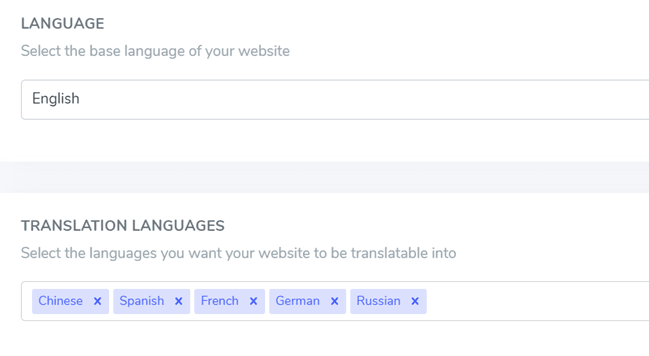
SEO important note: The number of languages you setup has a large impact on SEO. When you setup your translation languages, if you have a large amount of indexed pages (>500), search engine may take a lot of time to process them. It may impact your SEO in your original language. That’s why we recommend adding at first a maximum of 5 languages, then when it’s indexed, you can add languages in a batch of 3 per month.
Modify the domain DNS according to the languages
Automatically Add domain DNS using Entri
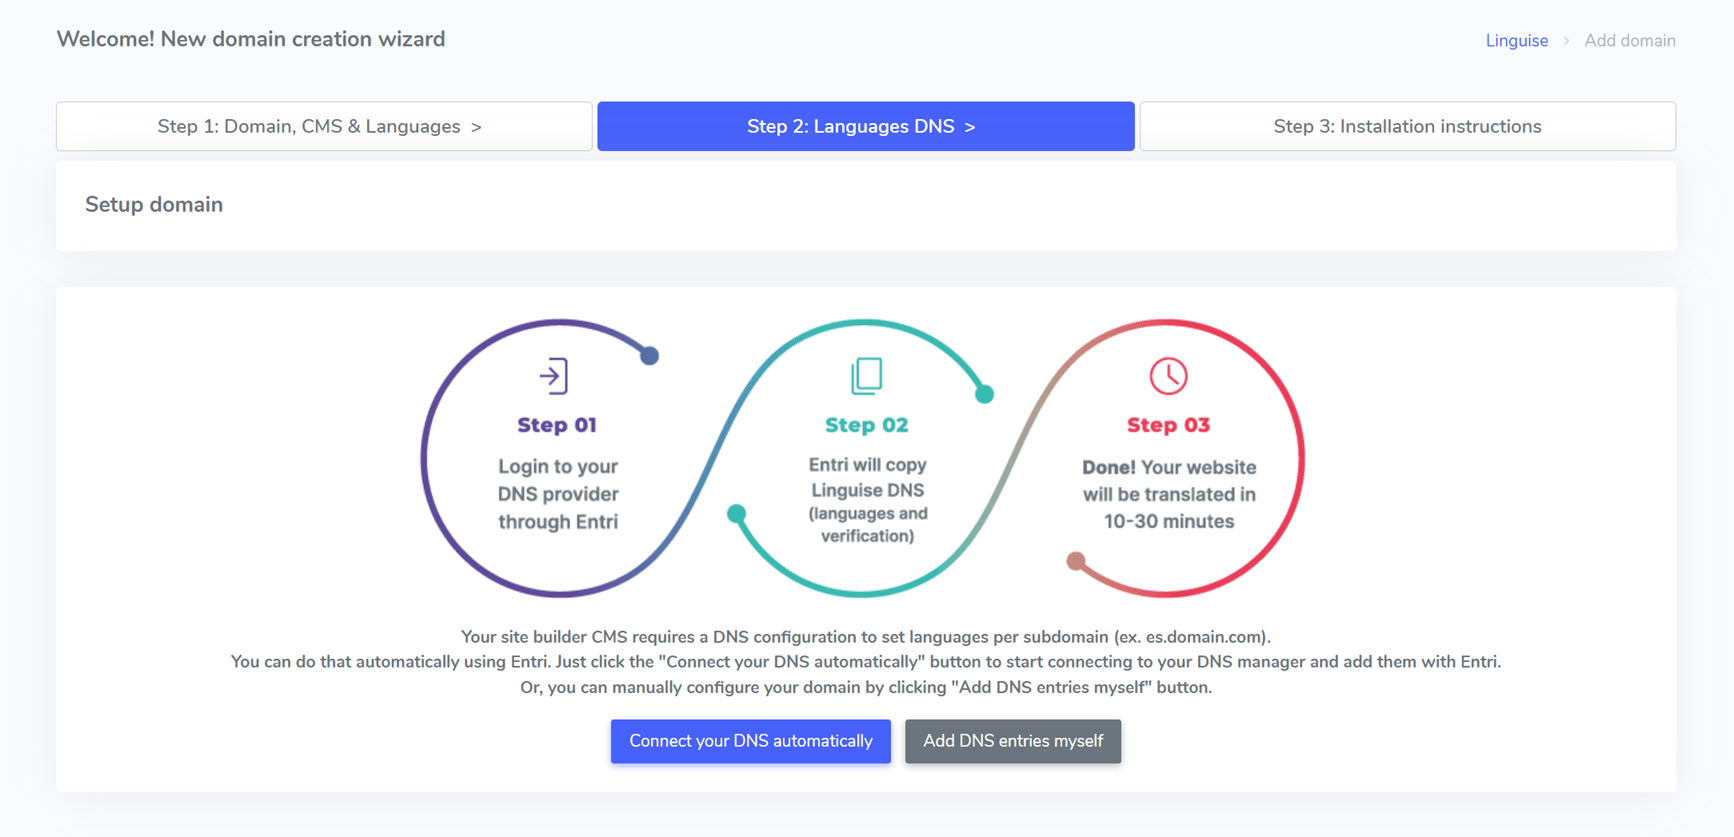
Once you have successfully registered your website within Linguise dashboard, you’ll have two options to proceed with the installation.
You should probably see this content, If you prefer to automatically add the DNS records, you can click on “Connect your DNS automatically.” This feature, called Entri, will automatically add your DNS records, allowing you to proceed with the installation easily. The other option is to manually copy the DNS in your domain provider.
After clicking the button, Entri will analyze your registered website URL and check your public DNS record. Based on that, it will determine the provider and the DNS that are required.
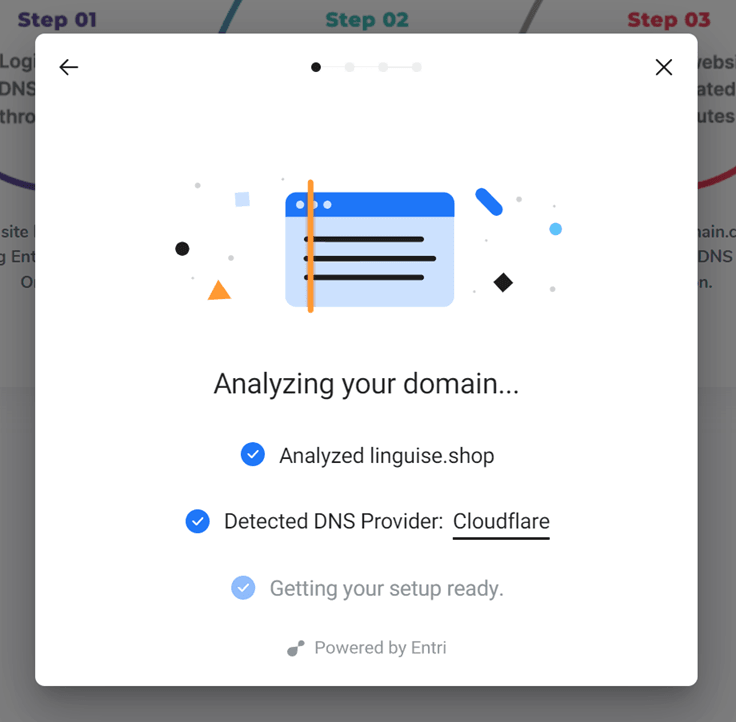
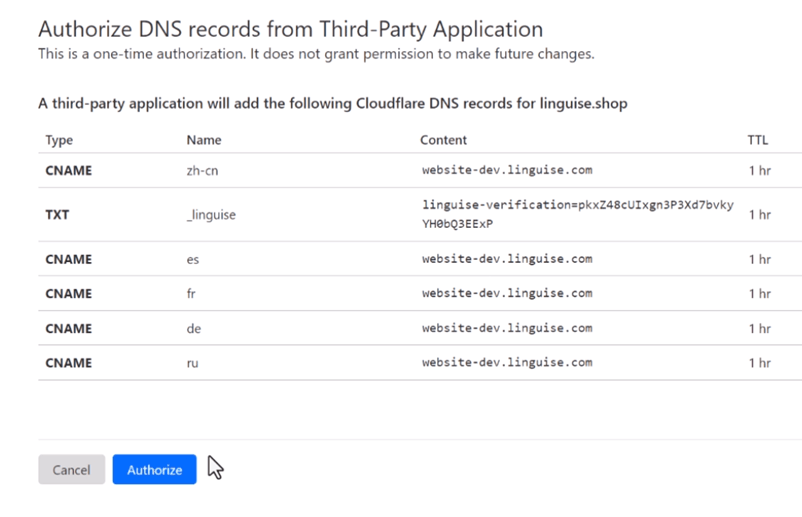
Next, you can click on “Authorize with [your domain provider]” (in this example, it’s Cloudflare). You will then see the panel changing into your domain provider’s login page, where you can log in and continue.

After you log in into your domain provider, Entri will do the rest, automatically adding the proper DNS records. One DNS per language + one TXT DNS for the validation key.
You should be able to see that DNS is added within your domain. For example:
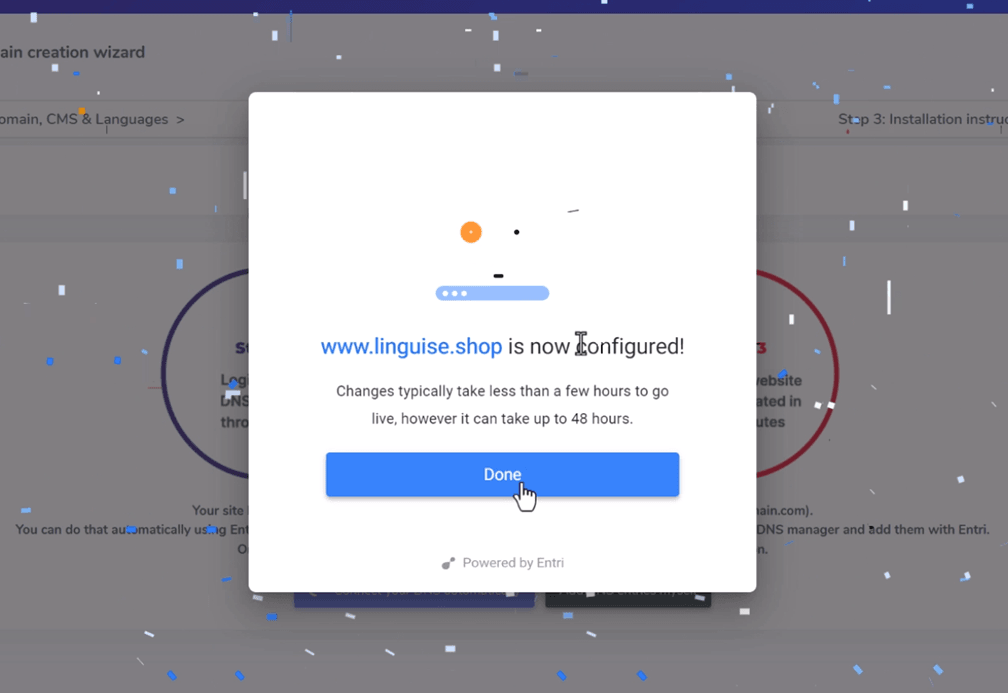
Once you have authorized it, Entri will notify you that all DNS settings have been configured successfully.
You should be able to use the translation feature as soon as all the DNS entries have been propagated on your domain (usually takes 20/30 minutes).
If you prefer Manual Installation, you can also do this manually by following the steps that we will provide below.
Copy DNS records
After you’ve validated your domain, you’ll be redirected to a screen where the DNS to add to your domain are ready to be copied. These records are required to load your website multilingual pages as fr.domain.com, es.domain.com…
Here are the main elements you’ll need to copy to Volusion DNS configuration.
After that, you need to connect to your domain manager and access the DNS setup area. Then, following the instructions, you can copy:
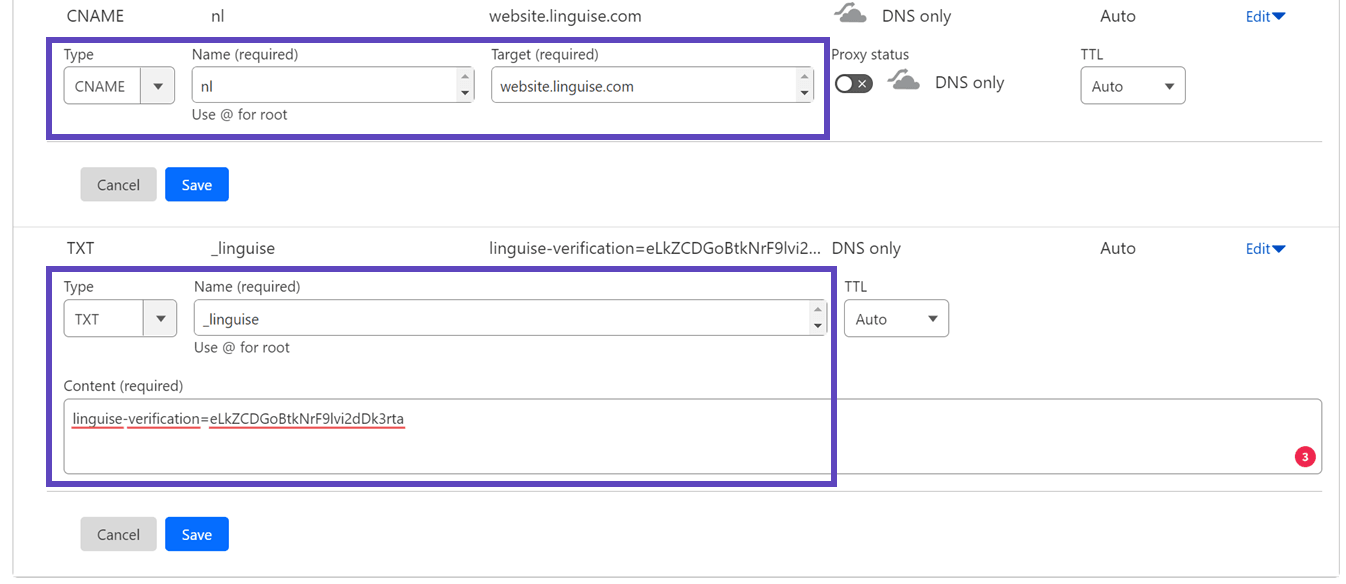
- One TXT record for the domain verification
- One or several CNAME records for the languages
Here’s an example for each record type (TXT and CNAME):
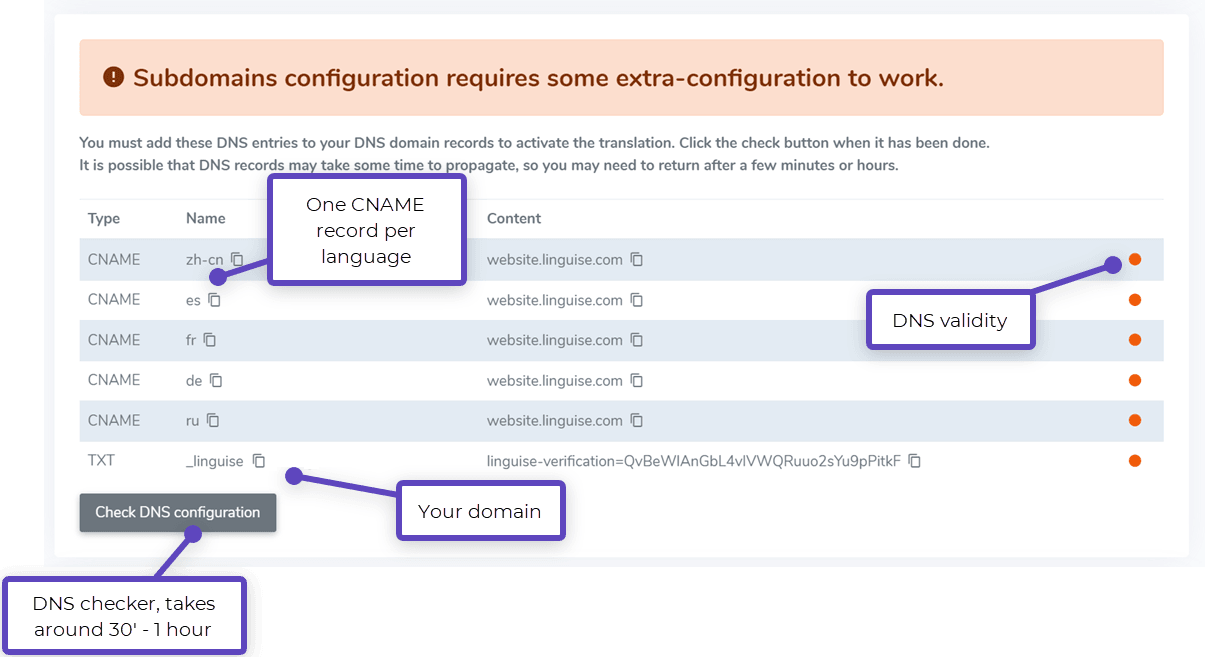
After adding all your records, your configuration should look like that.
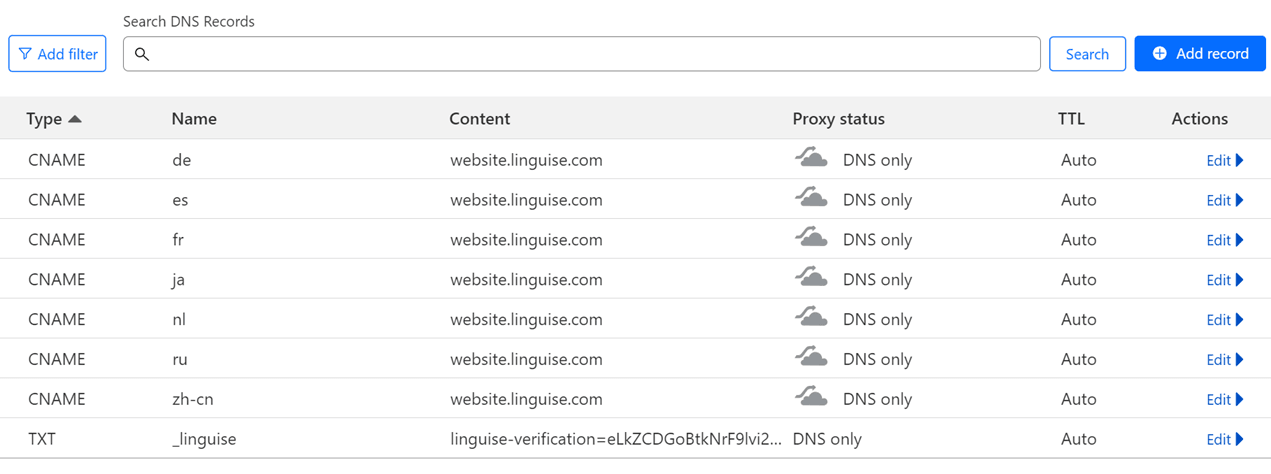
Verify DNS validation
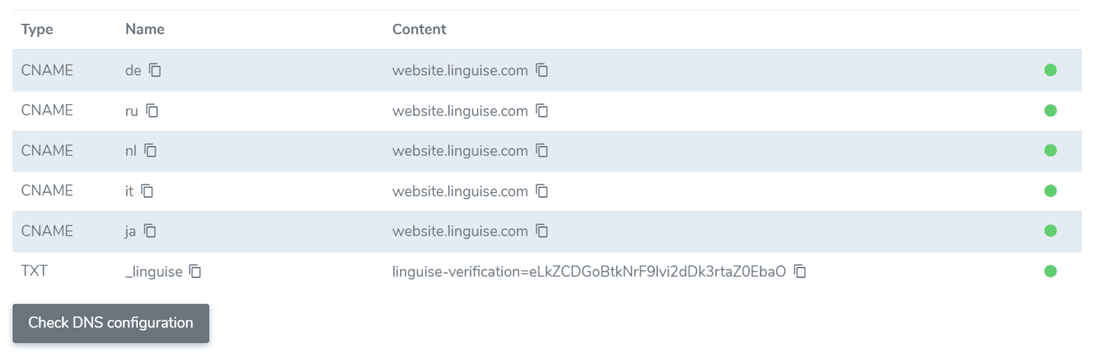
After adding all your records to your domain DNS, you can check the DNS propagation by clicking on the button Check DNS configuration.
DNS validation usually takes between 30 minutes and 1 hour. After that, you should see green dots on the right part of the DNS list in the Linguise dashboard. You’re almost ready to translate your Volusion website, just the link to the language switcher with country flags is missing.
Add the language switcher to the Volusion Site Builder
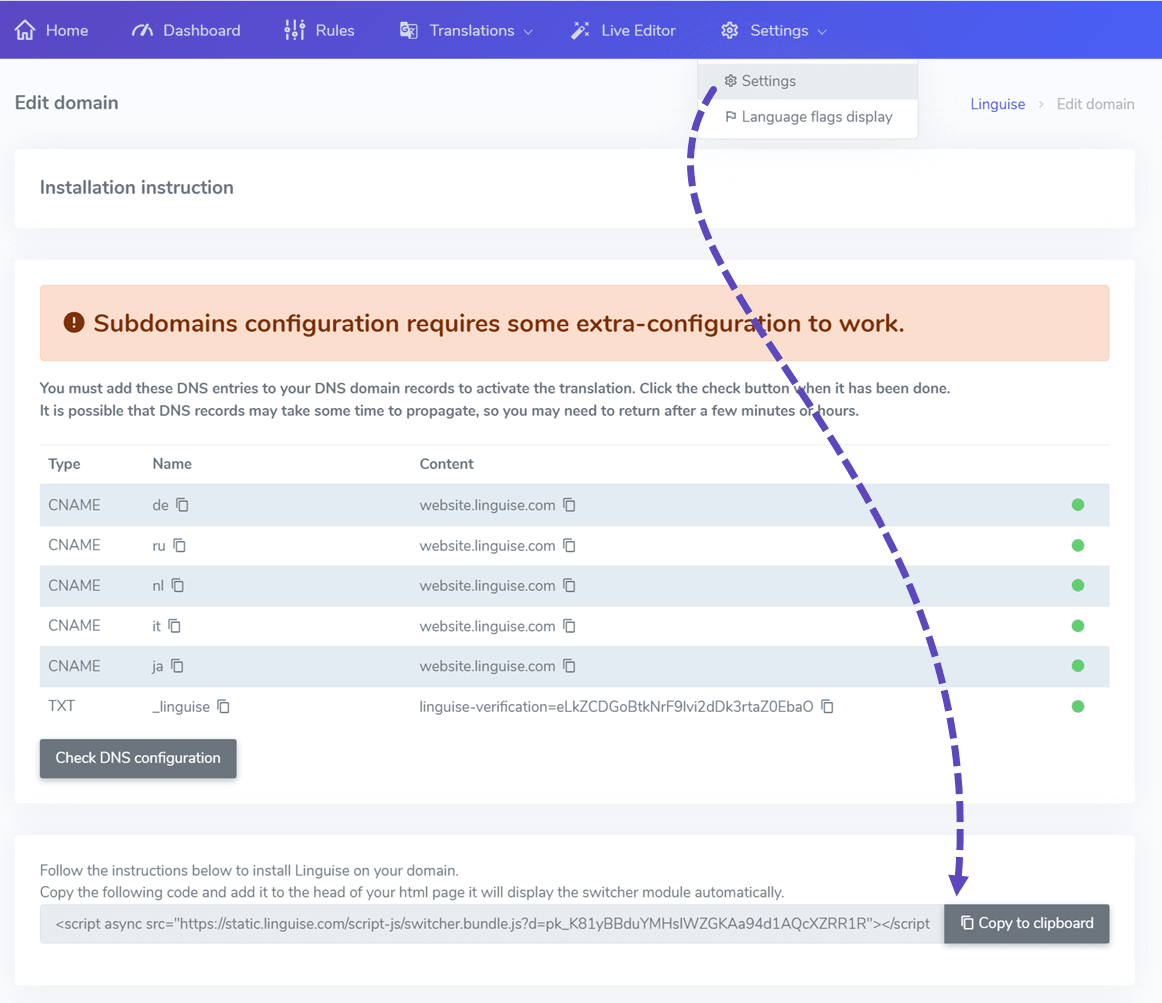
The language switcher is the flag popup to select the language you want. To load it, you’ll need to copy the code given at the head of your Volusion site pages. The flag language switcher will then be loaded automatically on your public website.
The link to copy is given at the end of the domain registration or in the domain settings. Copy the link to clipboard.
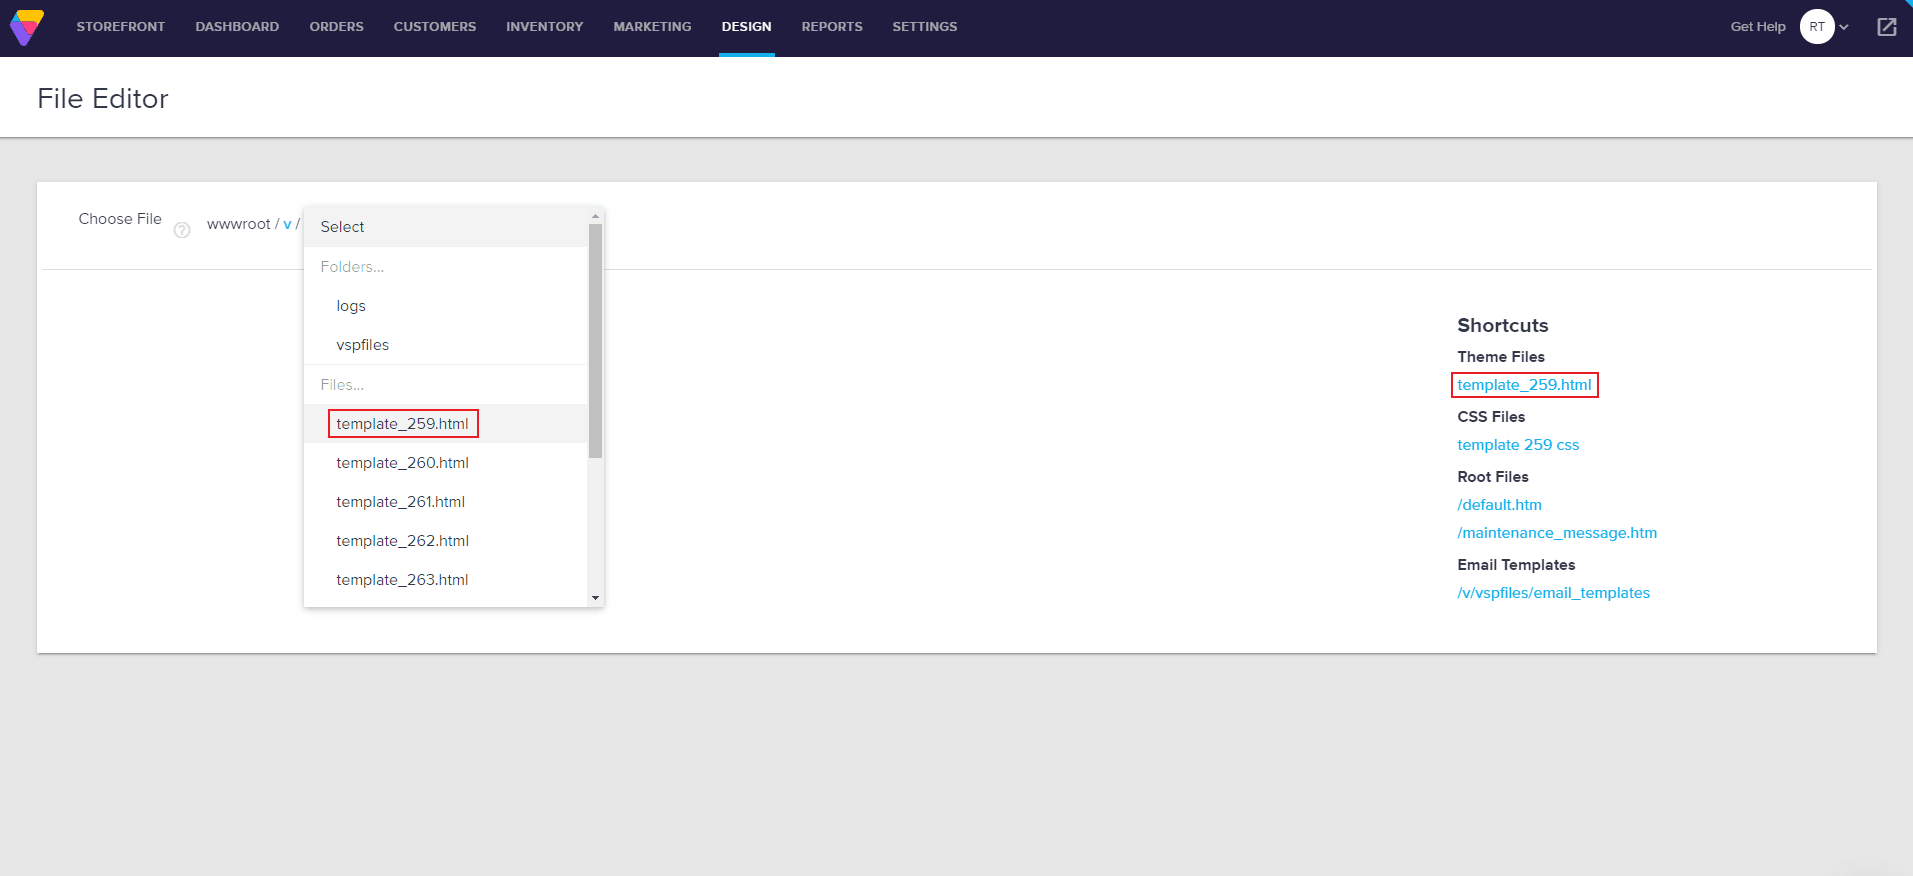
To include the script, you need to go to your Volusion website custom code. In the dashboard, go to Design and select File Editor
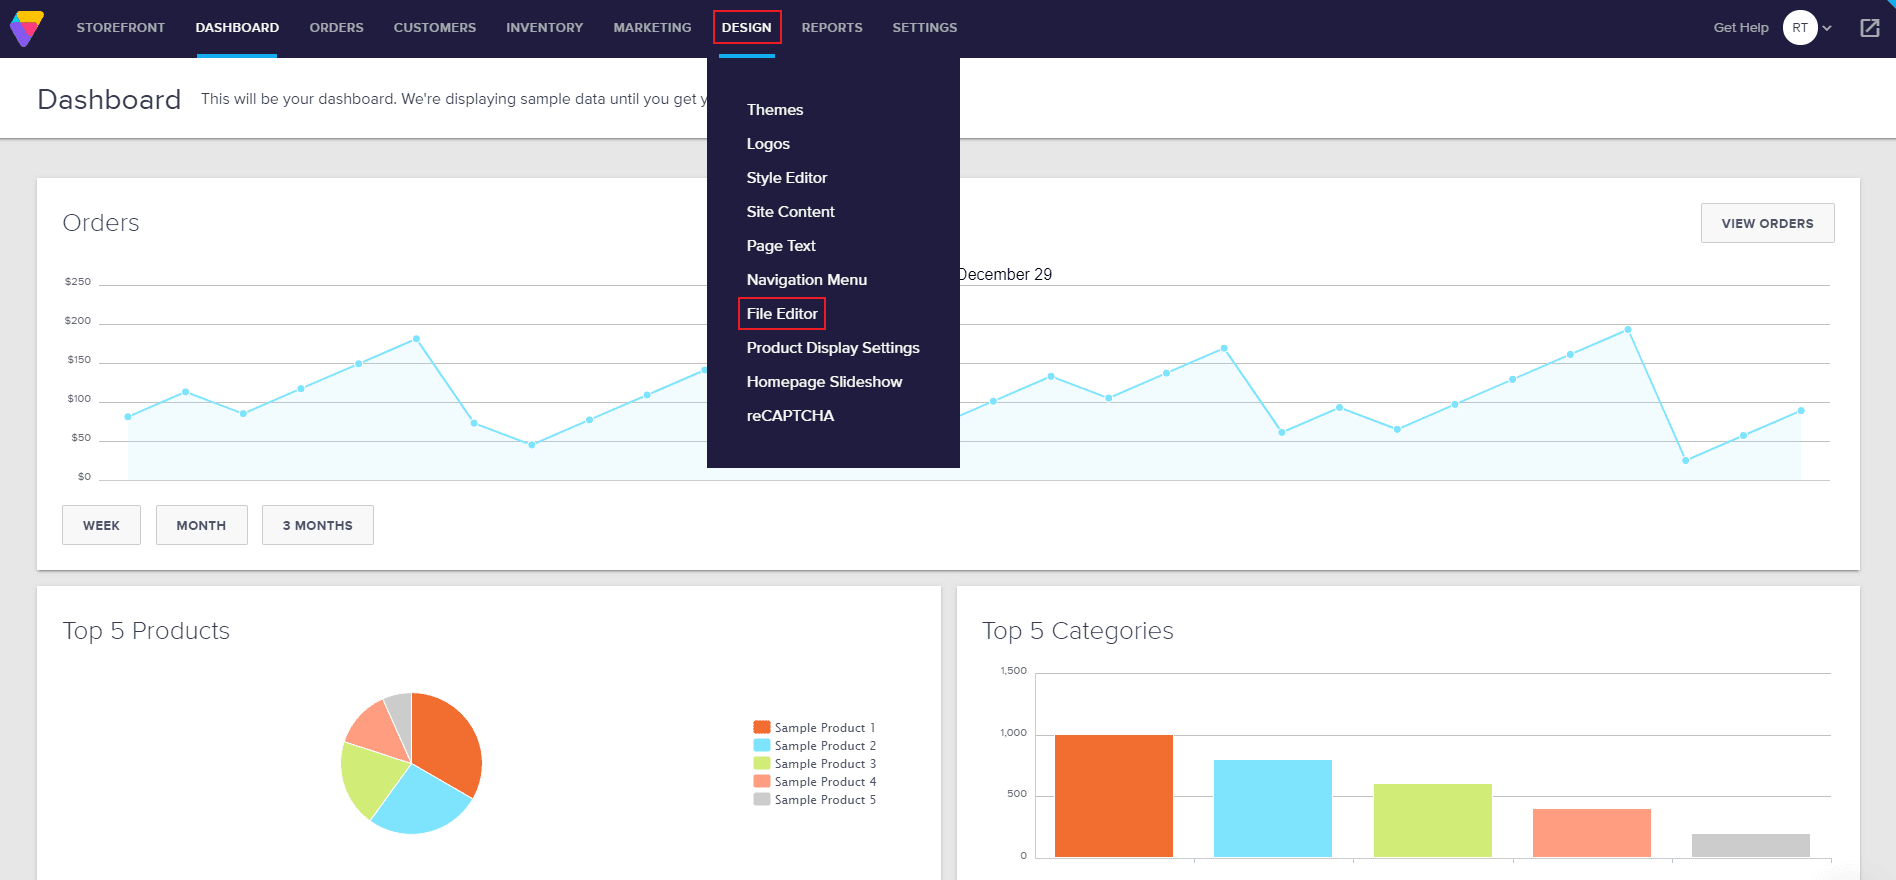
Then under Shortcuts > Select Theme Files, on the right is your active template’s HTML file starting with “template_” and ending with .html.
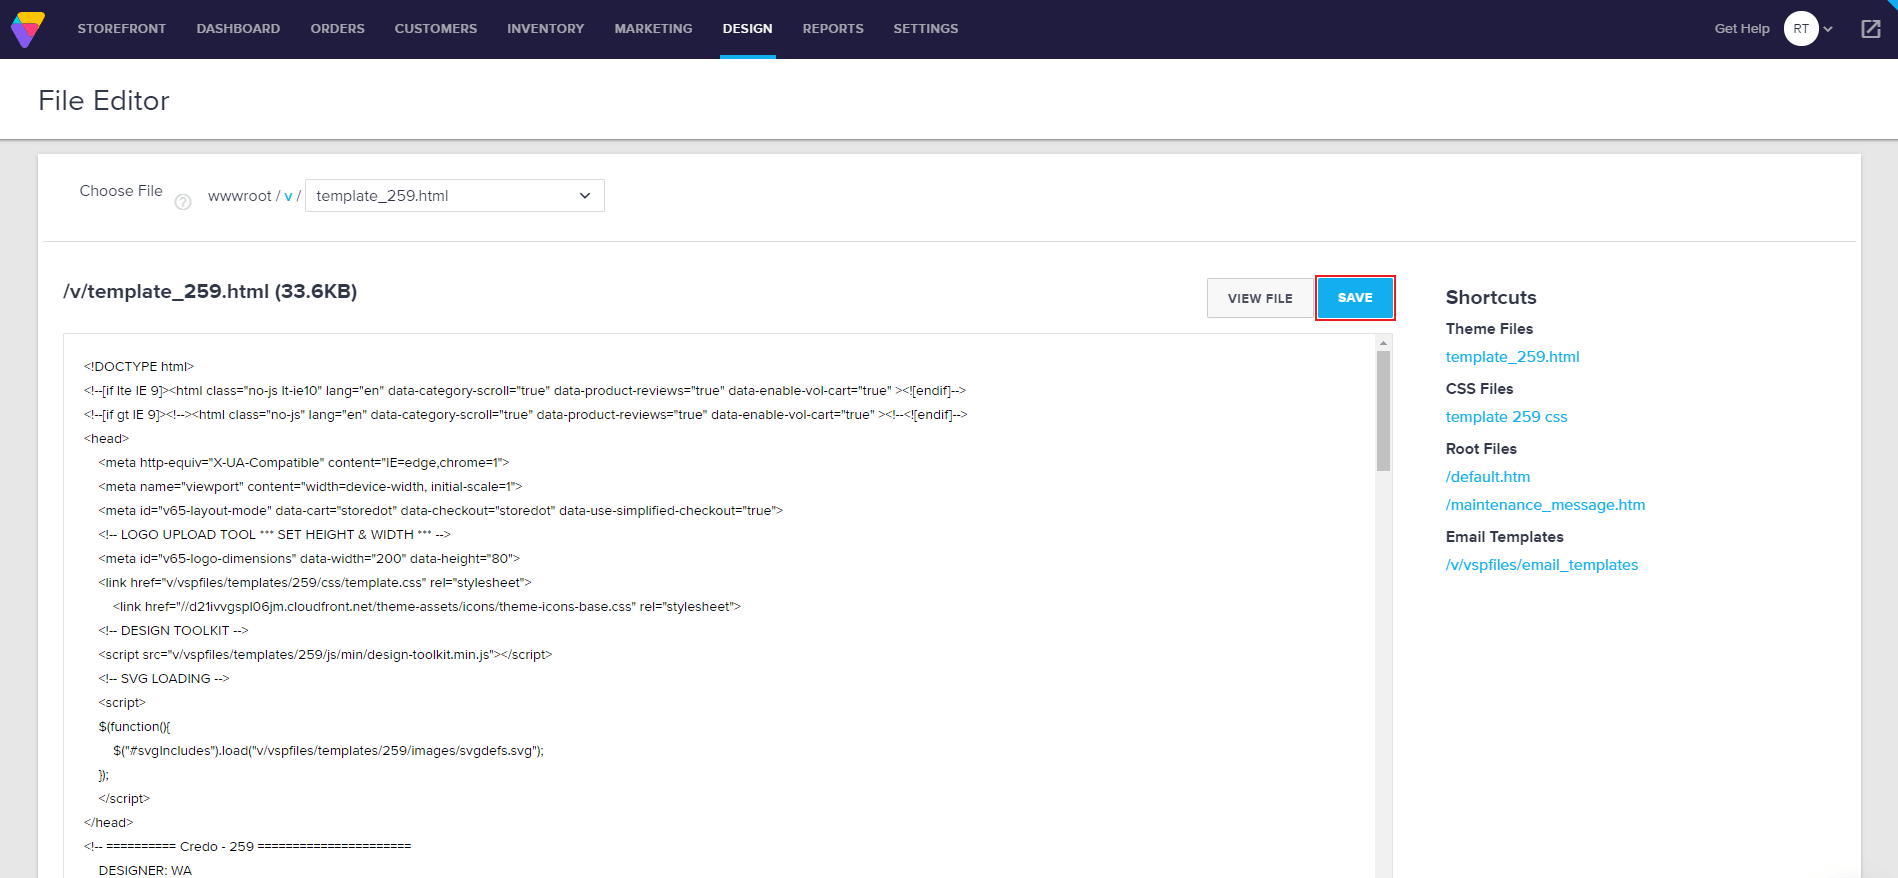
Click it, and you’ll be prompted with a text editor to modify the HTML code of your template. We suggest putting the Linguise script link right before the closing of the body tag, which is always the second line from the end of the file.
After paste the script, click Save.
Now, on your Volusion website frontend, you should have the Linguise language switcher available.

Volusion language switcher design
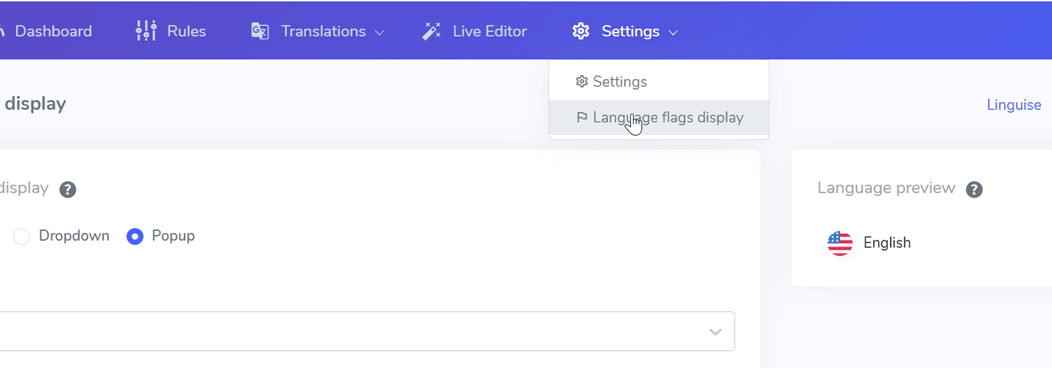
The language switcher can be customized from the Linguise dashboard > Settings > Language flags display. Every modification here will be reflected on the website.
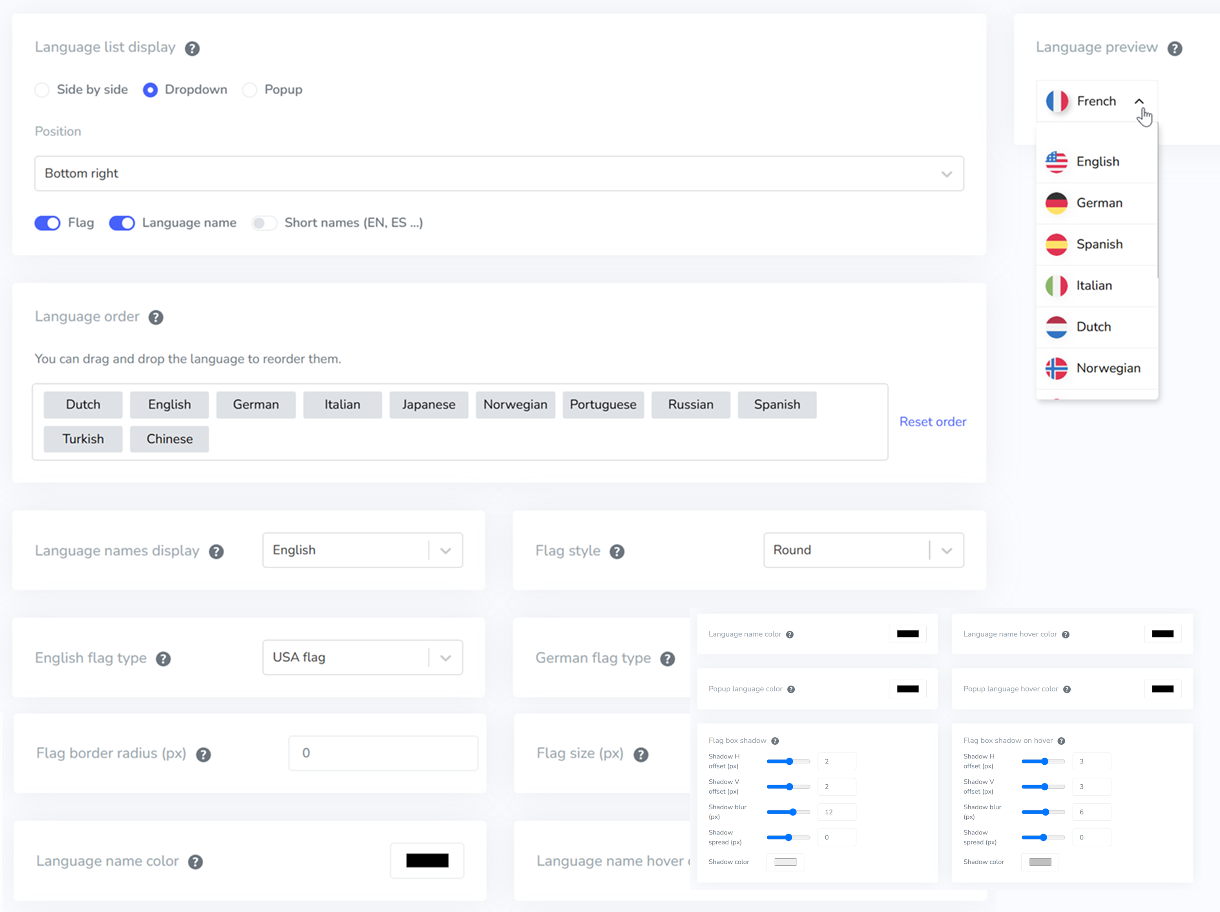
On the right side of the screen you have the preview of the language switcher. Here are the elements you can setup:
- 3 layouts: side by side, dropdown or popup
- The language switcher position
- The language switcher content
- Language names in English or native language
- Flags shapes and size
- Colors and box shadow
Frontend translation editor on Volusion
The frontend editor facilitates translators to modify any HTML content on Volusion in any language. You can edit a page by clicking on a page element and replacing the text, link, or image.
It’s also possible to edit the meta information by clicking on the brackets {}