

Table of Contents
Technical requirements
In order to run the Linguise translation script, you’ll need the following:
- Run PHP 7+ and Laravel
- Apache, LiteSpeed, NGINX, IIS server
- Activate the URL rewriting in your server configuration
- Laravel’s root folder typically set on “public” folder, make sure to install Linguise within this folder
1. Generate the API Key
After your connection to your Linguise dashboard you’ll need to setup a new domain first and save it’s settings to get the API Key.
The API key is what is required to activate the translation on your website. Basically, the API key will check what language is activated on what domain and will allow the neural translation pages to be generated.
Copy the API Key and keep it in your clipboard.
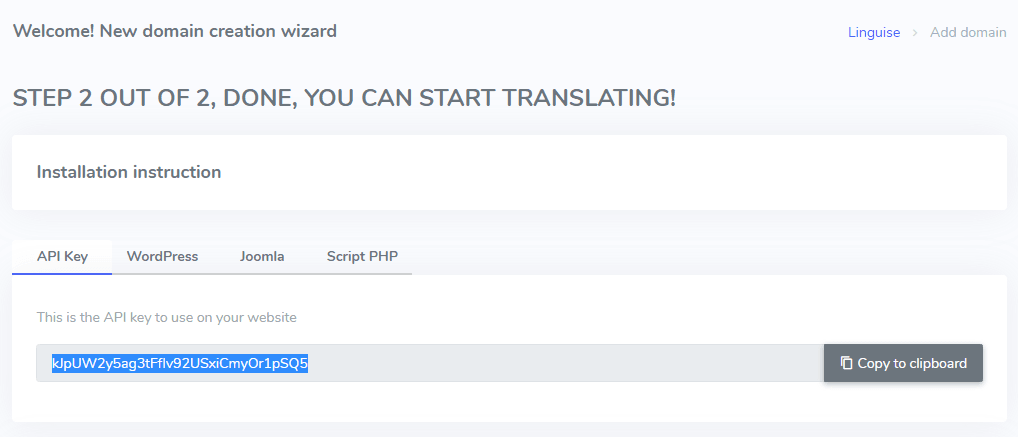
Then by clicking on the tab “Script PHP” you’ll get the installation instructions we’ll follow here in details.
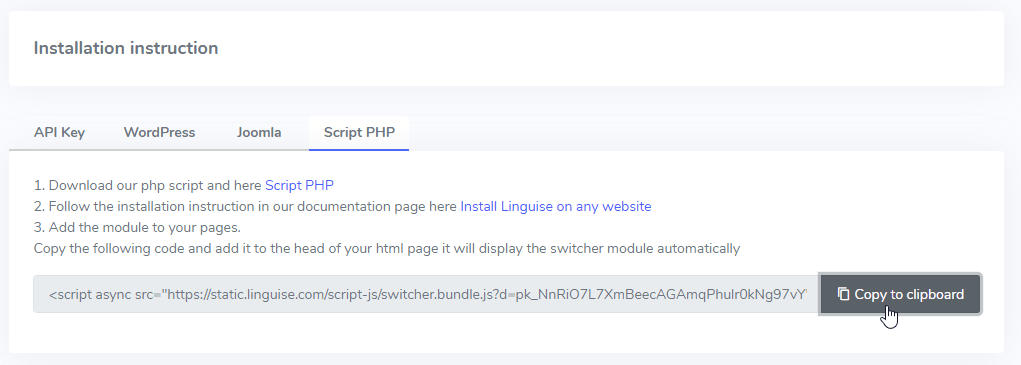
2. Upload and connect the Linguise translation script
The Linguise translation script needs to be uploaded to your server, in the folder where Laravel is installed, it can be downloaded here:
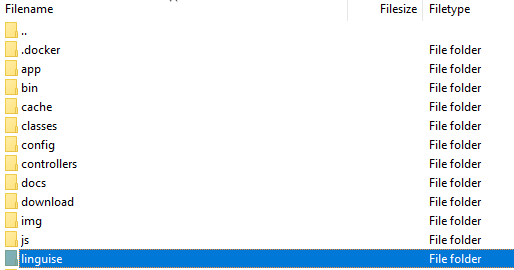
After the script is downloaded, unzip it and upload it to the root folder where the Laravel is installed.
- Make sure it’s at the root level of your Laravel install (usually Laravel set the root on “public” folder you can install Linguise there)
- Make sure the folder is called “linguise” (the default name when the folder is unzipped)
How to access Linguise Script Interface?
After completing the Linguise installation, you can access the dashboard by visiting your website with the following URL format:
https://www.domain.com/linguise
Change the domain address according to your website address*
Ensure Linguise have proper read and write permission*
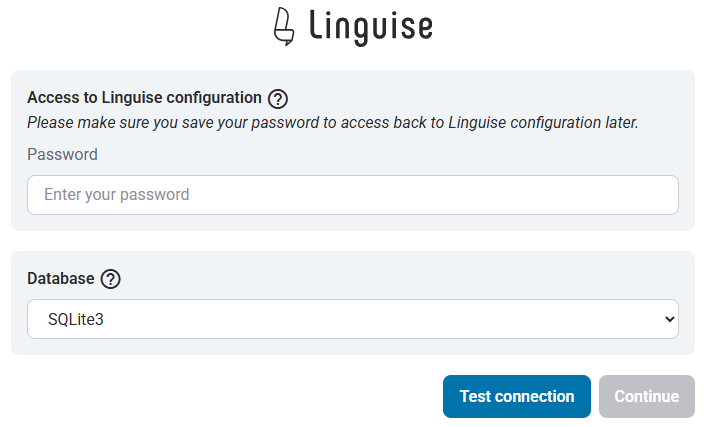
Setup Password and Database Connection
Once you access the script interface, you’ll be presented with a setup screen where you can create a password and connect to your preferred database.
You can:
- Set a password, which will be required for future access to this interface.
- Choose your database type — either MySQL or SQLite, depending on your setup and preference.
This initial setup ensures secure access and allows you to configure the script according to your environment.
MySQL database connection
If you choose MySQL, a different interface will appear asking for the following connection details of MySQL Configuration Fields below:
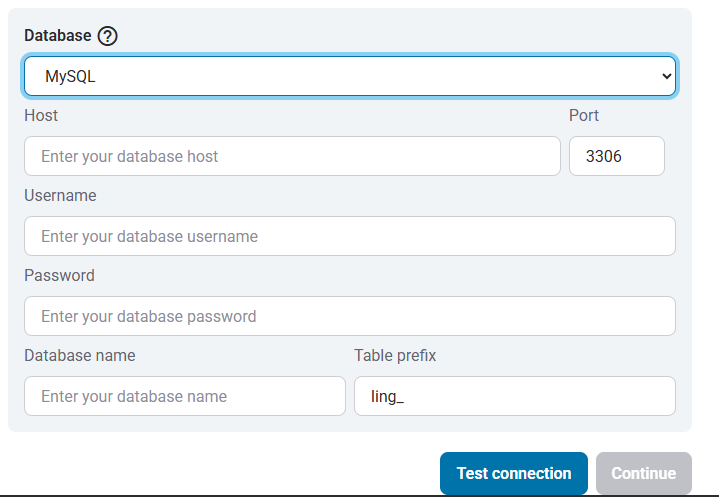
Make sure the information is correct to establish a successful connection to your MySQL database.
MySQL vs SQLite – What’s the Difference?
Both MySQL and SQLite are popular database systems used to store and manage data for websites and applications. However, they are designed for different use cases and have some key differences:
| Feature | SQLite | MySQL |
|---|---|---|
| Setup | Very easy (SQLite installation required) | Requires server setup |
| Storage | Single file | Managed by MySQL server |
| Performance | Great for small-scale apps | Better for large, high-traffic systems |
| Use case | Local apps, testing, small sites | Web apps, eCommerce, enterprise systems |
Linguise Script Interface: Setup for PHP platform
The Linguise translation dashboard, previously available only for Joomla and WordPress, now extends support to PHP and additional platforms. This update allows users to seamlessly configure language settings—such as display options, flag styles, and appearance customization—directly from a unified interface, regardless of their CMS or framework.
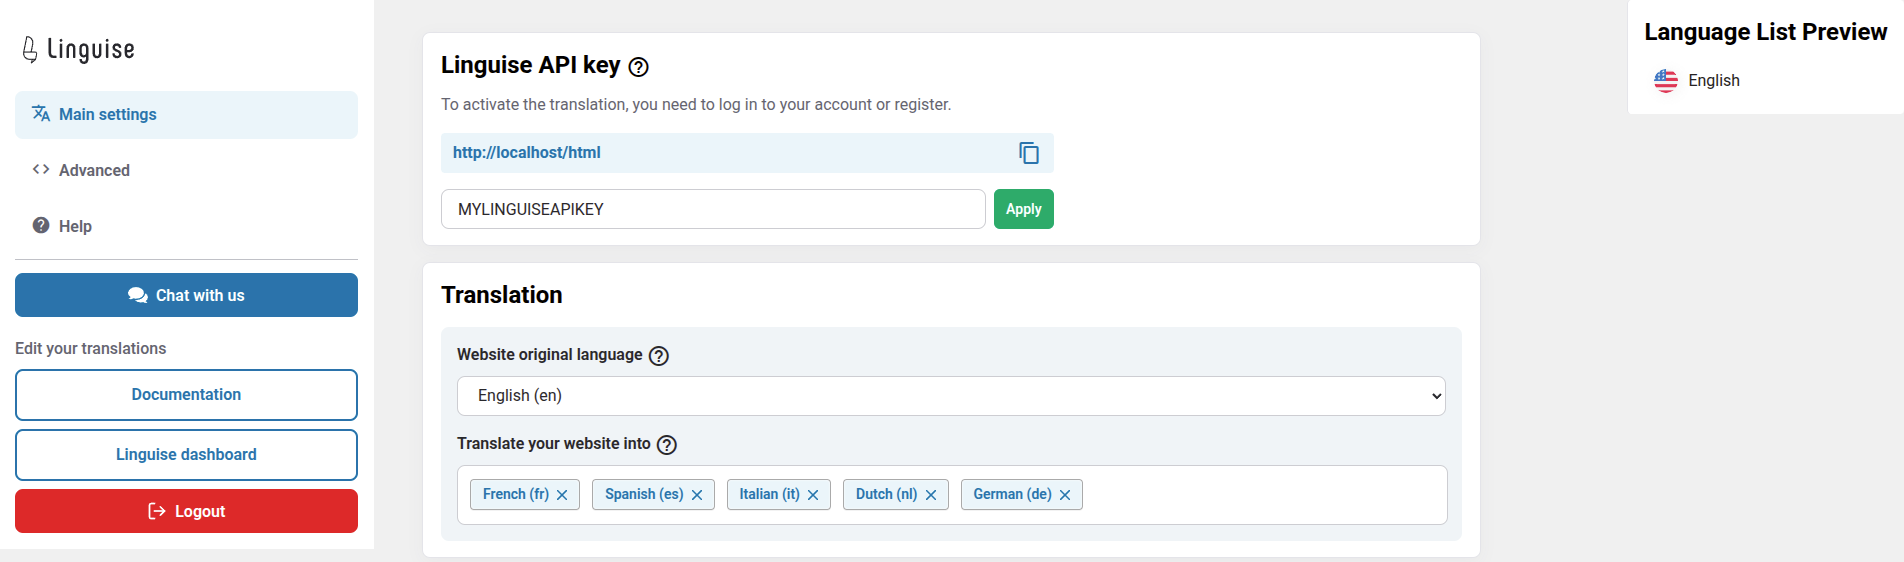
Administrators can manage Linguise settings more efficiently, with consistent features like language selection popups, shadow effects, and region-specific flag choices variants. The dashboard retains its user-friendly design while offering broader compatibility for diverse web environments.
3. Setup the language URLs
The URL by language needs to be configured in the .htaccess file, if you have a “RewriteBase /” in your file just copy after that all the following code:
					<IfModule mod_rewrite.c>
  RewriteEngine On
  RewriteRule ^linguise/linguise.php$ - [L]
  RewriteRule ^(af|sq|am|ar|hy|az|eu|be|bn|bs|bg|ca|ceb|ny|zh-cn|zh-tw|co|hr|cs|da|nl|en|eo|et|tl|fi|fr|fy|gl|ka|de|el|gu|ht|ha|haw|iw|hi|hmn|hu|is|ig|id|ga|it|ja|jw|kn|kk|km|ko|ku|ky|lo|la|lv|lt|lb|mk|mg|ms|ml|mt|mi|mr|mn|my|ne|no|ps|fa|pl|pt|pa|ro|ru|sm|gd|sr|st|sn|sd|si|sk|sl|so|es|su|sw|sv|tg|ta|te|th|tr|uk|ur|uz|vi|cy|xh|yi|yo|zu|zz-zz)(?:$|/)(.*)$ linguise/linguise.php?linguise_language=$1&original_url=$2 [L,QSA]
</IfModule>

4. Activate the language switcher on Laravel
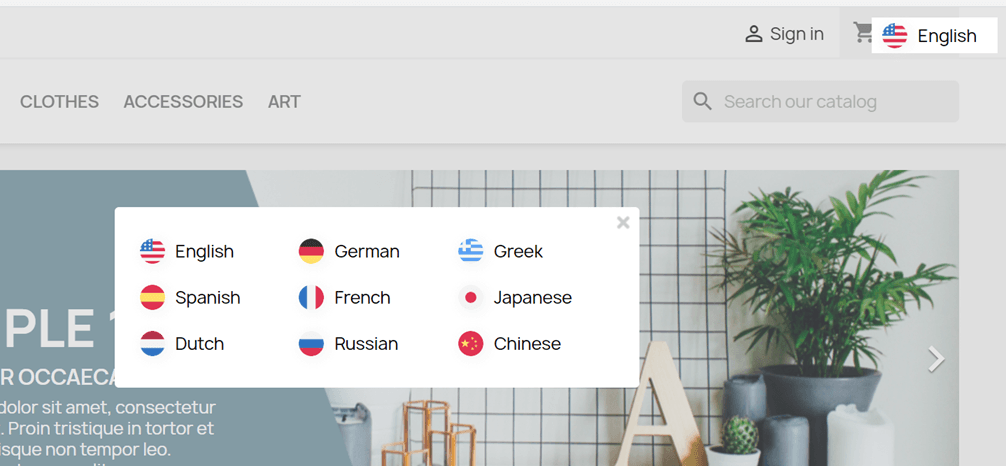
The language switcher is the flag popup to select the language you want. To load it, you’ll need to copy the code given at the end of the website configuration (Linguise dashboard).
The script has to be loaded in the head of your HTML pages handled by Laravel. The flag language switcher will then be loaded automatically.

The language switcher will be displayed by default in a floating top right position on your website. You are welcome to customize it as you wish with CSS.
SEO important note: The number of languages you setup has a large impact on SEO. When you setup your translation languages, if you have a large amount of indexed pages (>500), search engine may take a lot of time to process them. It may impact your SEO in your original language. That’s why we recommend adding at first a maximum of 5 languages, then when it’s indexed, you can add languages in a batch of 3 per month.
Setup the language switcher
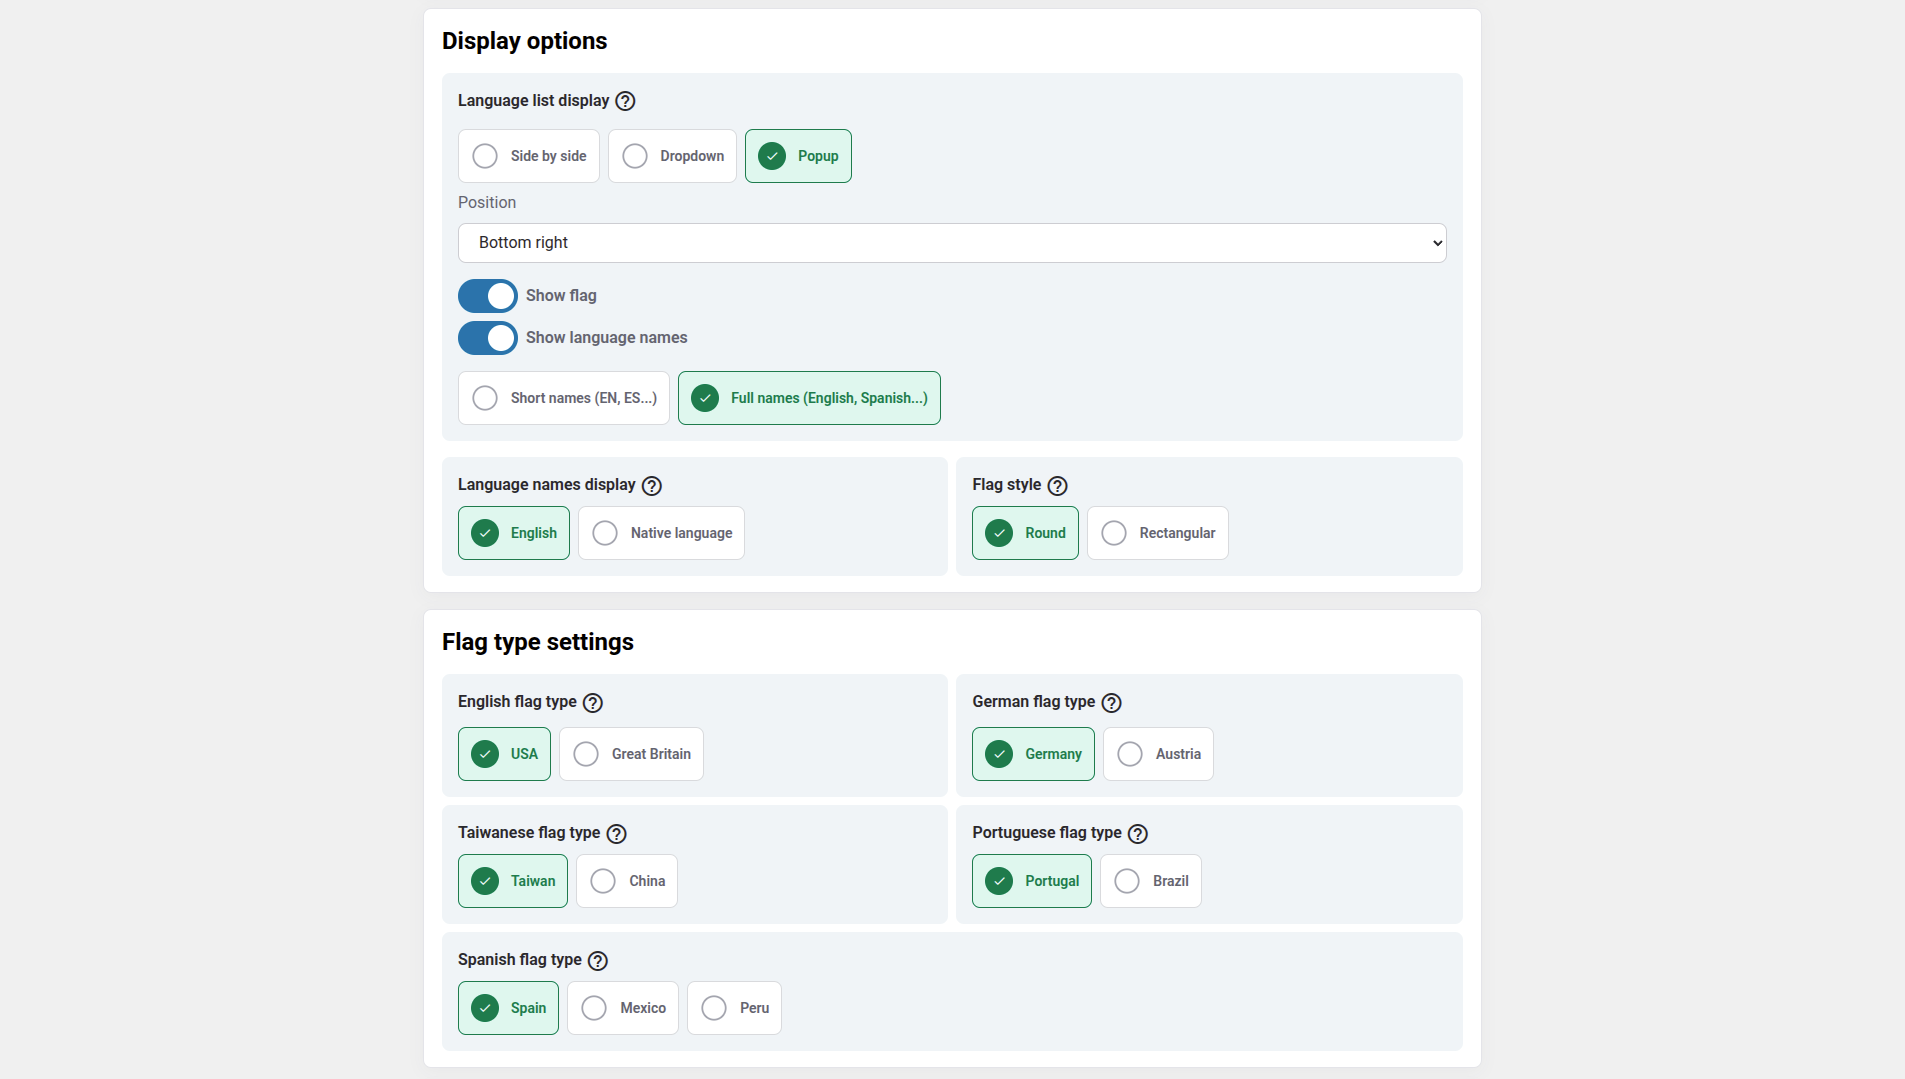
The language switcher can be customized from the Linguise dashboard > Settings > Language flags display. Every modification here will be reflected on the website.
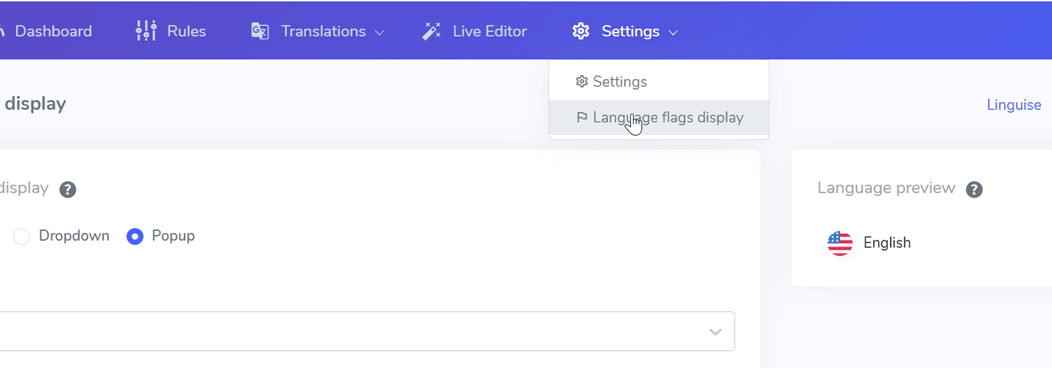
On the right side of the screen you have the preview of the language switcher. Here are the elements you can setup:
- 3 layouts: side by side, dropdown or popup
- The language switcher position
- The language switcher content
- Language names in English or native language
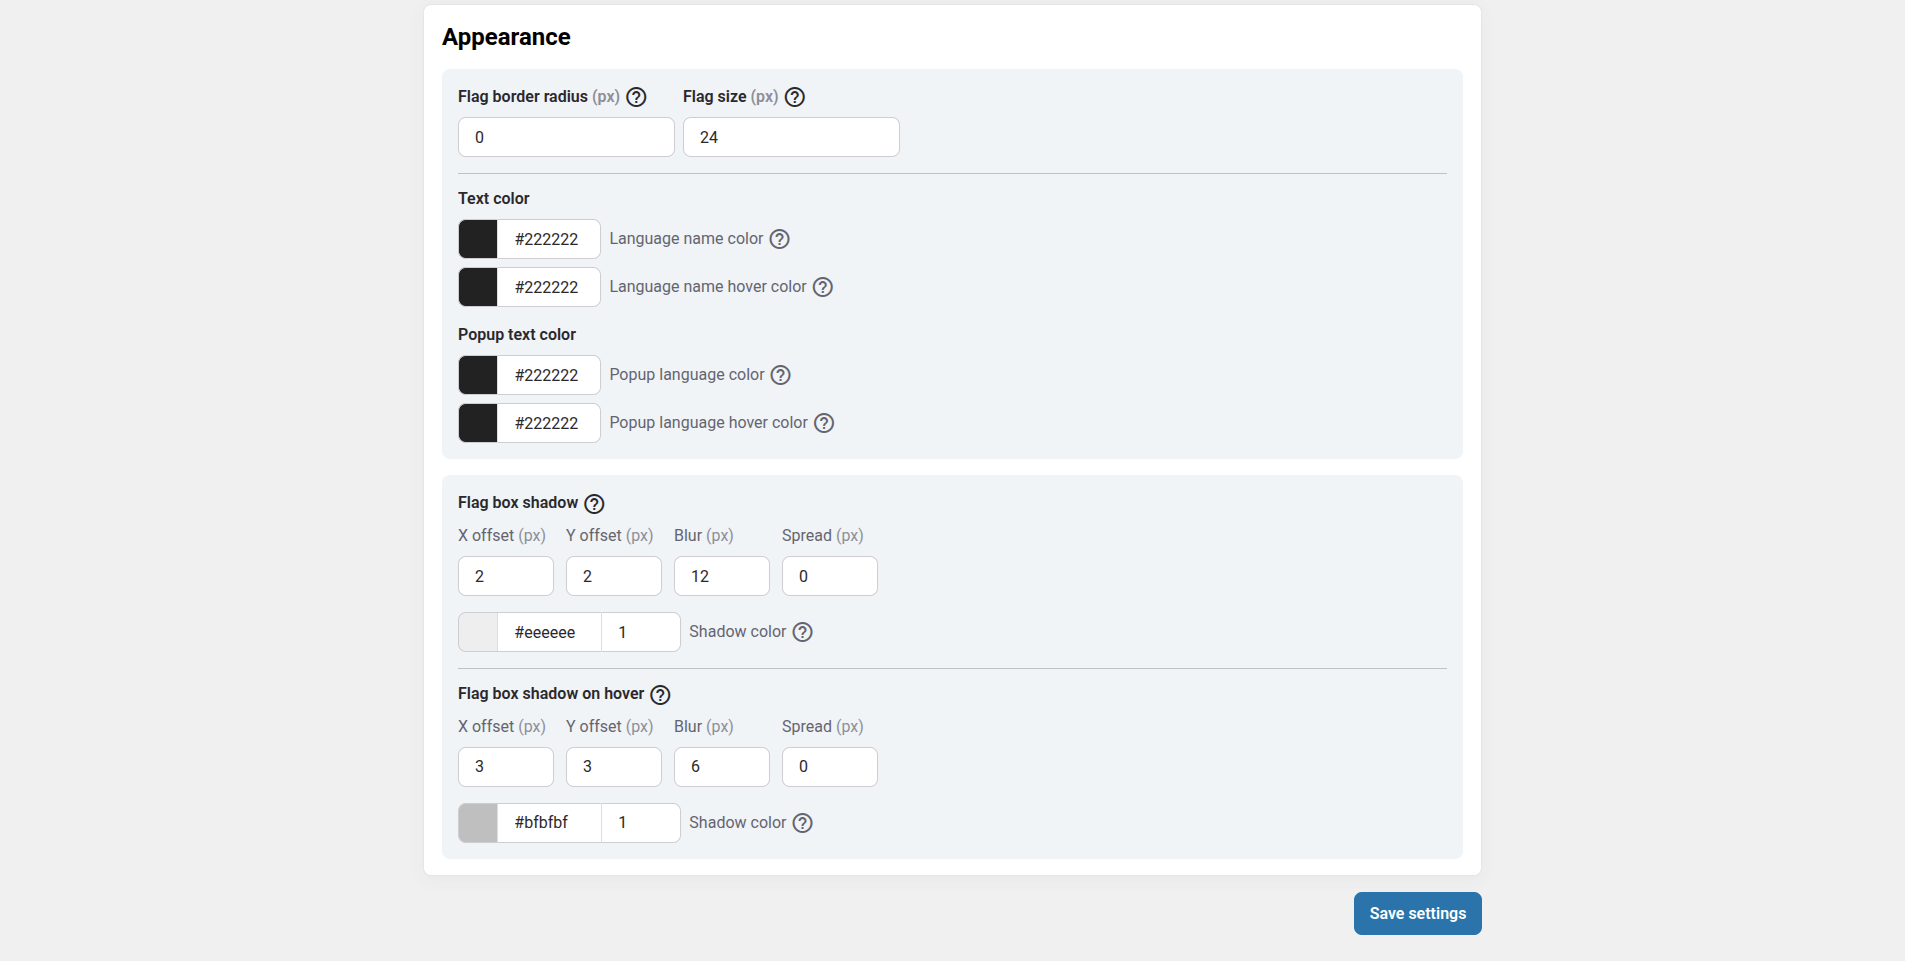
- Flags shapes and size
- Colors and box shadow
Load the language switcher in Laravel content
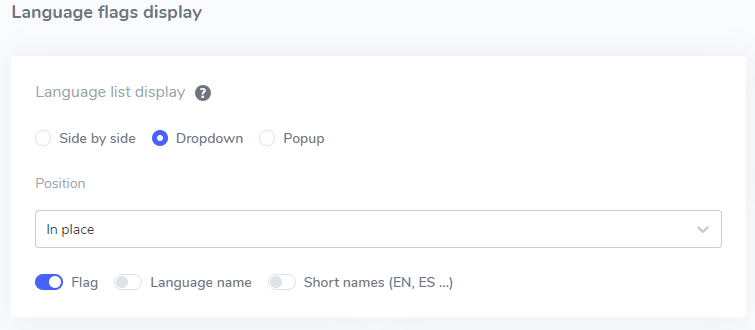
To display the Language switcher at the specific place, in the Laravel content, you should set the position as “In place”.
Once you have set the position in the Linguise dashboard, you can add the shortcode below to include it. Click on the code below to put it in your clipboard.
<div>[linguise]</div>
Once it’s added, on the frontend you’ll have the flag and language names displayed in the HTML area you’ve added the code.
Local cache system for Laravel pages
As an option, you can activate a local cache system that stores URLs and its related multilingual content to serve the pages faster. The local cache will save some data transfer between Linguise server and your website server. The cache is used only when a page has already been translated and has not been updated. The cache kept in priority will be the cache from the most viewed multilingual pages.
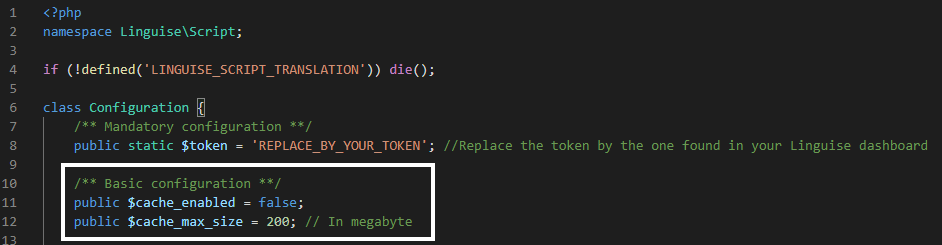
As an option, you can define the amount of cache stored in MB. In the following example the cache is activated and the amount of cache to keep is 500MB:
					    /** Basic configuration **/
    public $cache_enabled = true;
    public $cache_max_size = 500; // In megabyte
Specific settings for Laravel Platform
In the Configuration.php file we also have a setting that allows to pass some specific configuration for the CMS or non-CMS. By default, it’s automatic, but the support team may ask you to personalize it to use some special settings.
Here’s the code to add for Laravel, this is the CMS name in lowercase:
					    /** Basic configuration **/
    /*
     * Update the CMS value according to your CMS
     * Available CMS are: laravel, prestashop
     */
    public static $cms = 'laravel';
From SQLite to MySQL
Still in the Configuration.php there’s a setting to force the usage of MySQL instead of SQLite, in case SQLite is not installed on the server.
In this case, you’ll need to fill the MySQL information in this part of the Configuration.php file:
					    /** Advanced database configuration **/
    /*
     *  In case you don't want to use Sqlite, you can use MySQL
     *  To do so, you need to fill the following variables
     *  Linguise will create the tables for you
     */
    public static $db_host = '';
    public static $db_user = '';
    public static $db_password = '';
    public static $db_name = '';
    public static $db_prefix = '';
Automatic translation on Laravel + Windows IIS servers
Add the line corresponding to your website builder in your Web.config file.
It should be set before any other redirection, especially the redirection to your PHP main file:
<rule name="Linguise" stopProcessing="true">
<match url="^(af|sq|am|ar|hy|az|eu|be|bn|bs|bg|ca|ceb|ny|zh-cn|zh-tw|co|hr|cs|da|nl|en|eo|et|tl|fi|fr|fy|gl|ka|de|el|gu|ht|ha|haw|iw|hi|hmn|hu|is|ig|id|ga|it|ja|jw|kn|kk|km|ko|ku|ky|lo|la|lv|lt|lb|mk|mg|ms|ml|mt|mi|mr|mn|my|ne|no|ps|fa|pl|pt|pa|ro|ru|sm|gd|sr|st|sn|sd|si|sk|sl|so|es|su|sw|sv|tg|ta|te|th|tr|uk|ur|uz|vi|cy|xh|yi|yo|zu|zz-zz)(?:$|/)(.*)$" ignoreCase="false" />
<conditions logicalGrouping="MatchAll" trackAllCaptures="false" />
<action type="Rewrite" url="linguise/linguise.php?linguise_language={R:1}&original_url={R:2}" appendQueryString="true" />
</rule>
Automatic translation on Laravel + NGINX servers
rewrite ^/(af|sq|am|ar|hy|az|eu|be|bn|bs|bg|ca|ceb|ny|zh-cn|zh-tw|co|hr|cs|da|nl|en|eo|et|tl|fi|fr|fy|gl|ka|de|el|gu|ht|ha|haw|iw|hi|hmn|hu|is|ig|id|ga|it|ja|jw|kn|kk|km|ko|ku|ky|lo|la|lv|lt|lb|mk|mg|ms|ml|mt|mi|mr|mn|my|ne|no|ps|fa|pl|pt|pa|ro|ru|sm|gd|sr|st|sn|sd|si|sk|sl|so|es|su|sw|sv|tg|ta|te|th|tr|uk|ur|uz|vi|cy|xh|yi|yo|zu|zz-zz)(?:$|/)(.*)$ /linguise/linguise.php?linguise_language=$1&original_url=$2 last;