Creating multilingual websites has become necessary for businesses and organizations catering to audiences from diverse linguistic backgrounds. Laravel, a widely used PHP web application framework, provides robust tools and features that make it easier to develop and maintain multilingual websites.
One crucial component of a multilingual website is the language switcher, which allows users to switch between available languages seamlessly. In this article, we’ll explore the importance of language switchers and provide a step-by-step guide on how to set it up on a Laravel multilingual website.
Why is a language switcher important on Laravel multilingual websites?
Before discussing how to set up a language switcher on a Laravel multilingual website, it’s important to understand why you need to do so.
- User experience: A well-designed language switcher enhances the user experience by allowing visitors to access content in their preferred language easily. This seamless transition to their native or preferred language ensures better comprehension and engagement with the website’s content. When users can consume information in a language they are comfortable with, they are more likely to stay on the website longer, explore more pages, and potentially convert into customers or take desired actions. A smooth language-switching experience eliminates frustration and barriers, leading to increased satisfaction and a positive overall user experience.
- Search Engine Optimization (SEO): Search engines prioritize websites that offer content in multiple languages, as it demonstrates a commitment to serving a global audience. A language switcher can improve your website’s visibility and ranking in search results. By providing content in multiple languages, you increase the chances of your website appearing higher in search results for queries in those languages, expanding your online reach and attracting more targeted traffic.
- Reduction in bounce rate: A user-friendly language switcher helps decrease bounce rates. When visitors can swiftly find and select their preferred language, they are more likely to remain on the site, explore content, and potentially convert. Users encountering content in an unfamiliar language may quickly leave the website, resulting in a high bounce rate. However, with a language switcher, they can easily navigate to their desired language version, encouraging them to stay and engage with the content, ultimately reducing the bounce rate.
- Increasing sales conversions: By providing content in languages visitors understand, you can increase the likelihood of conversions such as product purchases or service registrations. If visitors can easily understand product details, policies, and checkout processes in their language, barriers to purchasing decisions will be reduced. Offering multilingual content through a language switcher enhances the overall buying experience and can lead to higher conversion rates.
How to setup a language switcher on a Laravel multilingual website?
After understanding the importance of a language switcher on a multilingual Laravel website, let’s discuss how to implement it. Website translation services typically offer this feature, which can be customized according to user needs.
However, not all translation services offer easily customizable and user-friendly language switchers. Therefore, it is crucial to choose an automatic translation service that is compatible with various frameworks and provides flexible language switcher features.
One automatic translation service that meets these criteria is Linguise. Linguise automatic translation offers a highly customizable and user-friendly language switcher feature integrated with popular frameworks like Laravel.
Linguise provides seamless integration with the Laravel framework, allowing developers to incorporate the language switcher into their multilingual applications easily. By leveraging Linguise’s advanced features and user-friendly interface, you can streamline the process of setting up and maintaining the language switcher on your Laravel website.
Without further ado, here are the steps to install Linguise on a multilingual Laravel website and set up the language switcher.
Step 1: Register for a free Linguise account
The initial step to signing up involves creating a free account with Linguise and taking advantage of a one-month free trial. To register for a Linguise account, simply enter your email address to create a username and password.
During the one-month trial period, you will have access to Linguise’s full range of exciting features. Once the trial period ends, you will be redirected to the Linguise dashboard.
Step 2: Add domain Laravel website
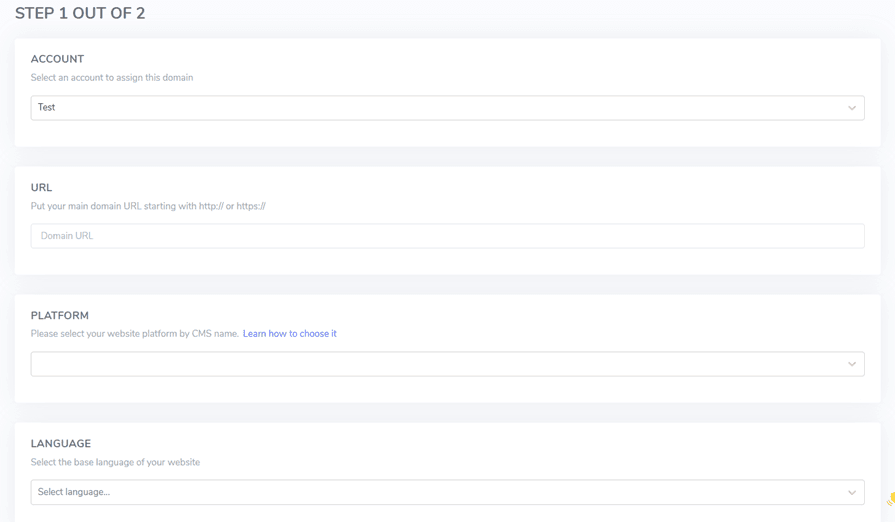
Once connected to the Linguise dashboard, you need to add a new website and save its settings to get an API Key. First, you need to add several columns to add a website, including the following.
- Account
- URLs
- Platforms/CMS
- Language
- Translation language
- Translate URLs
After that you will get an API key, this API key is activated to enable translation on your website. Basically, the API key checks which languages are enabled on a particular domain and allows the creation of automatically translated pages. Copy the API Key and save it in your clipboard.
Next, click on the “Script PHP” tab to get installation instructions, which we will follow in detail here.
Step 3: Upload and connect the Linguise translation script
The Linguise translation script needs to be uploaded to your server and put into the folder where Laravel is installed. You can download it here.
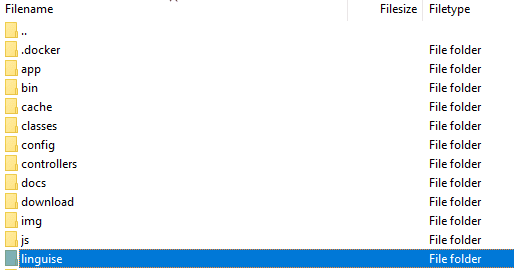
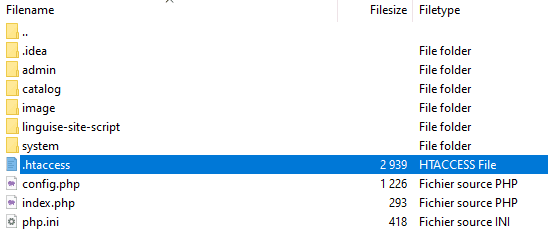
After downloading the script, unzip it and upload it to the root folder where Laravel is installed.
Ensure that the script is at the root level of your Laravel installation (usually where your CMS files are located). Make sure the folder is named “linguise” (the default name after unzipping).
Step 4: Setup the language URLs
Next, you need to set up language URLs. Language-based URLs need to be configured in the .htaccess file. If you have “RewriteBase/” in your file, simply copy all the following code after that.
					<IfModule mod_rewrite.c>
  RewriteEngine On
  RewriteRule ^(af|sq|am|ar|hy|az|eu|be|bn|bs|bg|ca|ceb|ny|zh-cn|zh-tw|co|hr|cs|da|nl|en|eo|et|tl|fi|fr|fy|gl|ka|de|el|gu|ht|ha|haw|iw|hi|hmn|hu|is|ig|id|ga|it|ja|jw|kn|kk|km|ko|ku|ky|lo|la|lv|lt|lb|mk|mg|ms|ml|mt|mi|mr|mn|my|ne|no|ps|fa|pl|pt|pa|ro|ru|sm|gd|sr|st|sn|sd|si|sk|sl|so|es|su|sw|sv|tg|ta|te|th|tr|uk|ur|uz|vi|cy|xh|yi|yo|zu|zz-zz)(?:$|/)(.*)$ linguise/linguise.php?linguise_language=$1&original_url=$2 [L,QSA]
</IfModule>
Step 5: Enable language switcher on Laravel
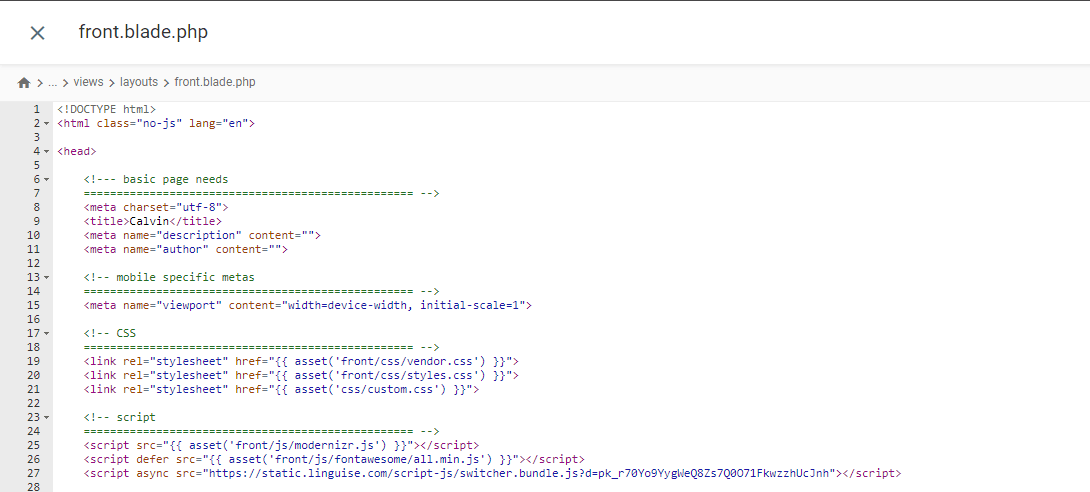
The next step is to activate the language switcher by pasting the script you obtained from the Linguise dashboard. Pasting this language switcher script may vary depending on the theme used in Laravel.
In this case, the script will be pasted into the front.blade.php file located in the resources/views/layouts/ directory. Below is a preview of the pasted script.
Step 6: Setup main display
To start setup the language switcher, navigate to the “Settings” > “Language flags display” section in the Linguise dashboard.
On this page, you can configure several options. The first is the main display settings, where you can adjust various aspects such as:
- Flag icon style: You can choose from three options; side-by-side display, dropdown menu, or popup.
- Position: This setting determines where the language switcher will be on your site. Various position options are available. Make sure to select a position that is easily accessible to visitors.
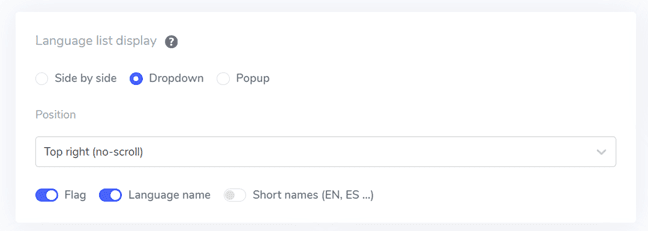
You can combine the display of flags and language names, flags and language abbreviations, or just language names. Using flags and language names is recommended for easier user recognition.
Step 7: Set the flag's design
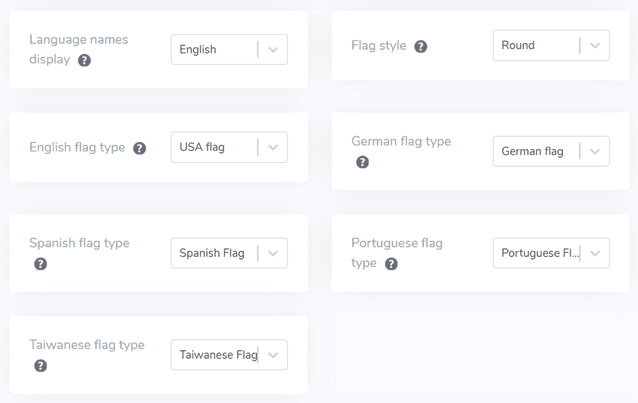
After configuring the main display, you can further customize the design of the flags that will be shown.
- Display language name: You can choose to show the language name based on either the country name or the language name itself. For example, you could display “French” or “Français”.
- English flag type: This option is helpful for languages with multiple variations, such as US or British English (it also applies to Spanish, Taiwanese, German, and Portuguese).
- Flag style: This setting allows you to choose the shape of the flag icon, either round or rectangular.
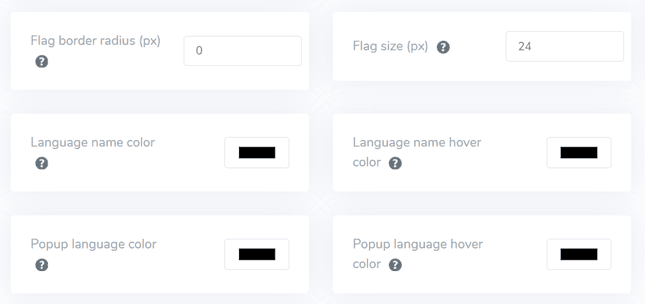
Step 8: Setup the color and size
After finishing the flag design configuration, you can customize the color and size of the flags. Here are some settings you can adjust.
- Flag border-radius: Customize the border radius in pixels for the rectangular flag style.
- Language name color: Choose the default text color to display the language name.
- Popup language color: Set the color of the language title text in the popup or dropdown area.
- Flag size: Adjust the size of the flag icons.
- Language name hover color: Set the text color that appears when the user hovers over the language name.
- Popup language hover color: Set the text color that appears when the user hovers over the language title in the popup or dropdown area.
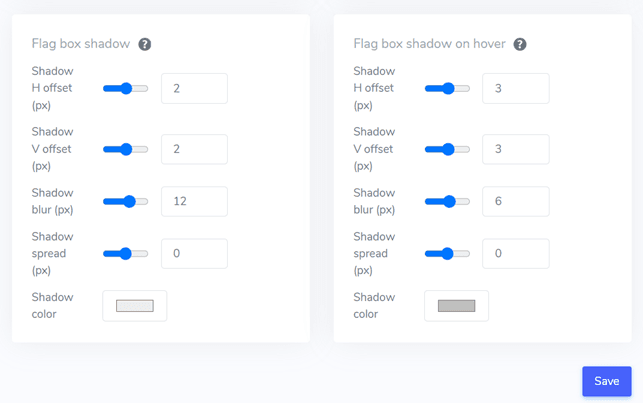
Step 9: Set flag box-shadow
Finally, you can configure the flag box shadow settings. The first option lets you apply a shadow effect to each flag icon displayed on your website. The next option controls the shadow effect when users hover their mouse over the language flags.
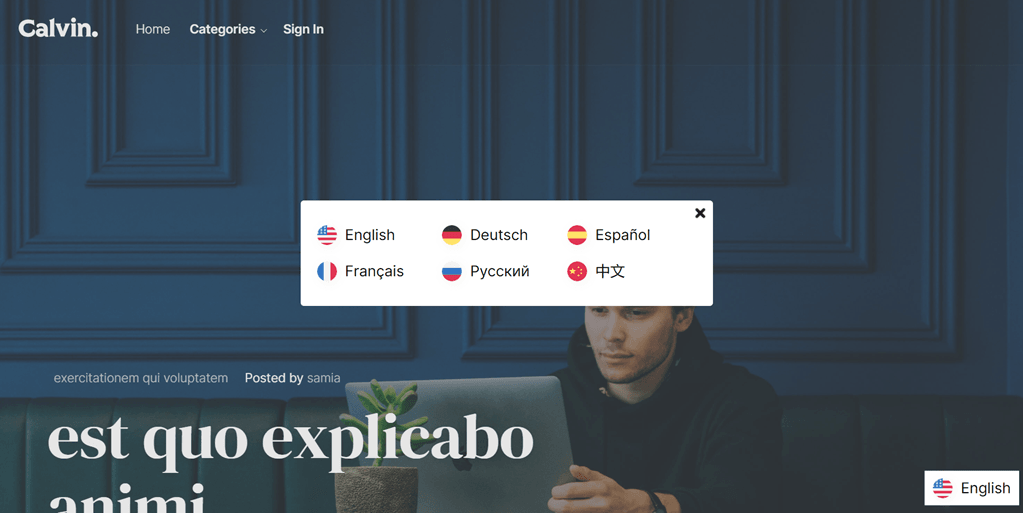
Once you have made all the desired adjustments, click the Save button to apply the customization changes. Afterward, navigate to your Laravel website to verify the configuration has been successfully applied. This is approximately how the language switcher will appear.
After completing the setup, you can now see how the language switcher works on your Laravel multilingual website.
After that we will try to translate the website into other languages, for example Francais.

Best practices for optimizing language switcher on Laravel multilingual website
After successfully setting up the language switcher on a Laravel multilingual website, you also need to know tips for optimizing the language switcher for both your website and your web visitors.
Use easily recognizable language icons or flags
Universally recognized symbols or flags are crucial for visitors to identify and select their preferred language option quickly. Ensure that the icons or flags used are visually prominent, have good color contrast, and are widely understood across cultures to avoid confusion or ambiguity. Familiar symbols or icons help create an intuitive and user-friendly experience, allowing visitors to navigate to their desired language version effortlessly. It is essential to choose icons or flags that are universally recognizable to avoid any potential misunderstandings or confusion.
Strategic placement of the language switcher button

Position the language switcher button in a prominent and easily accessible area of your website. Standard placements include the header, footer, or main navigation menu. These locations are intuitive for most internet users and align with their expectations when looking for language options. Consistent placement across all pages ensures that visitors can easily access the language switcher, regardless of their entry point or the specific page they are visiting. This consistent placement helps create a seamless and predictable user experience.
Maintain consistency across all pages

Ensure that the language switcher maintains a consistent appearance and behaviour throughout your entire website. Users should be able to switch languages seamlessly, regardless of the page they are on or the content they are viewing. Consistency not only provides a cohesive user experience but also reinforces the accessibility and availability of language options, fostering trust and confidence in your multilingual website. Any inconsistencies in the language switcher can lead to confusion and frustration for users, potentially causing them to abandon your website.
Consider using language names and flags

Instead of just using flags, it’s a good idea to consider using flags and language names in their original form. This approach can help avoid confusion, as some languages are spoken in some countries with different flags. Using language names directly eliminates ambiguity and ensures visitors can clearly identify and select the desired language without misinterpretation. In addition, the use of language names can be more inclusive and respectful of cultural diversity.
User-friendly language switching process

Simplify the process for users to switch to another language if the default language does not match their preferences. You can also use elements such as drop-down menus, flag/icon lists, or toggle buttons for language selection. However, ensure that each button can be clicked smoothly and clearly shows the available language options. This user-friendly approach minimizes friction and ensures smooth language transition, improving the overall user experience. A seamless and straightforward language-switching process can increase user satisfaction and encourage visitors to explore your multilingual content.
Setup a language switcher on the Laravel multilingual website using Linguise!
At this point, you should know you’re configuring the language switcher for the Laravel multilingual web. Developing a language switcher can yield various benefits and consequently lead to optimization based on the previously mentioned points.
By effectively optimizing the language switcher, it can significantly improve the overall user experience. Now, proceed to register a Linguise account, integrate your Laravel website, and fine-tune the language switcher to improve the user experience.